Installation and Usage Guide
1. Interface and Button Descriptions
The figure below shows the descriptions of the interfaces on the follower arm base plate:
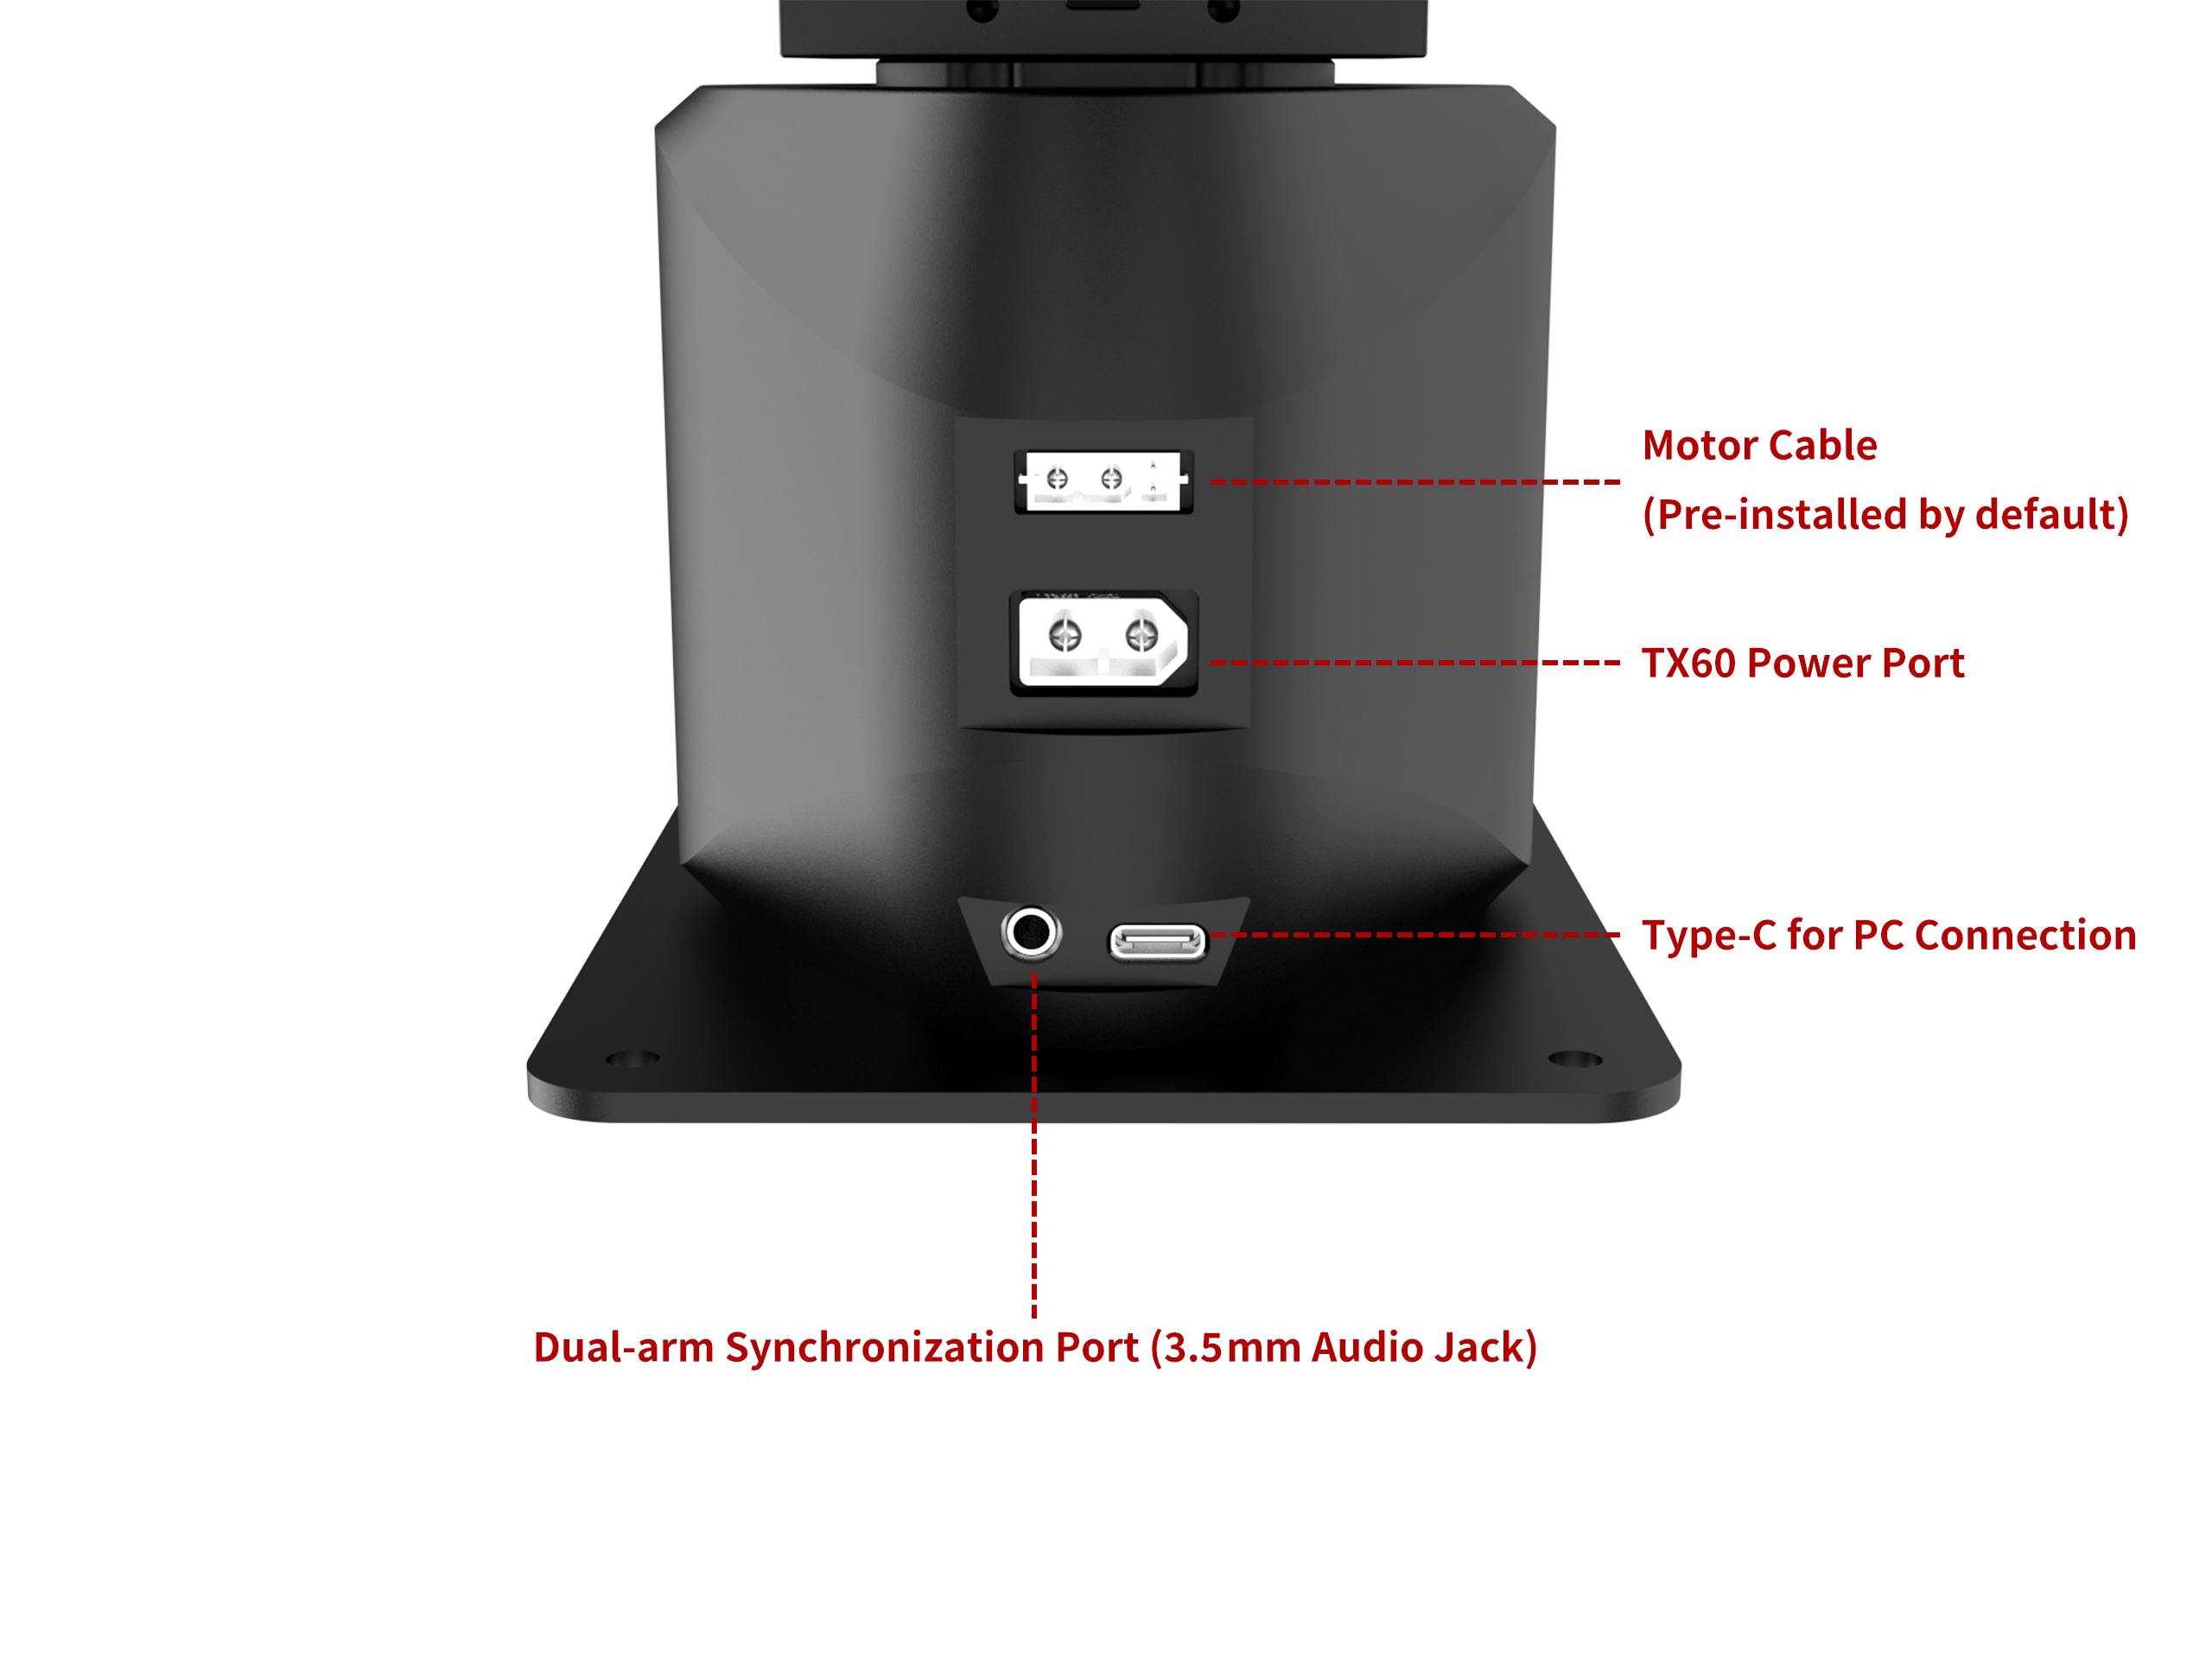
The follower arm's motor cable interface is used for the internal wiring of the robotic arm and was wired at the factory. Do not unplug this cable or use this interface.
2. Follower Arm Installation Guide
(1) Robotic Arm Placement
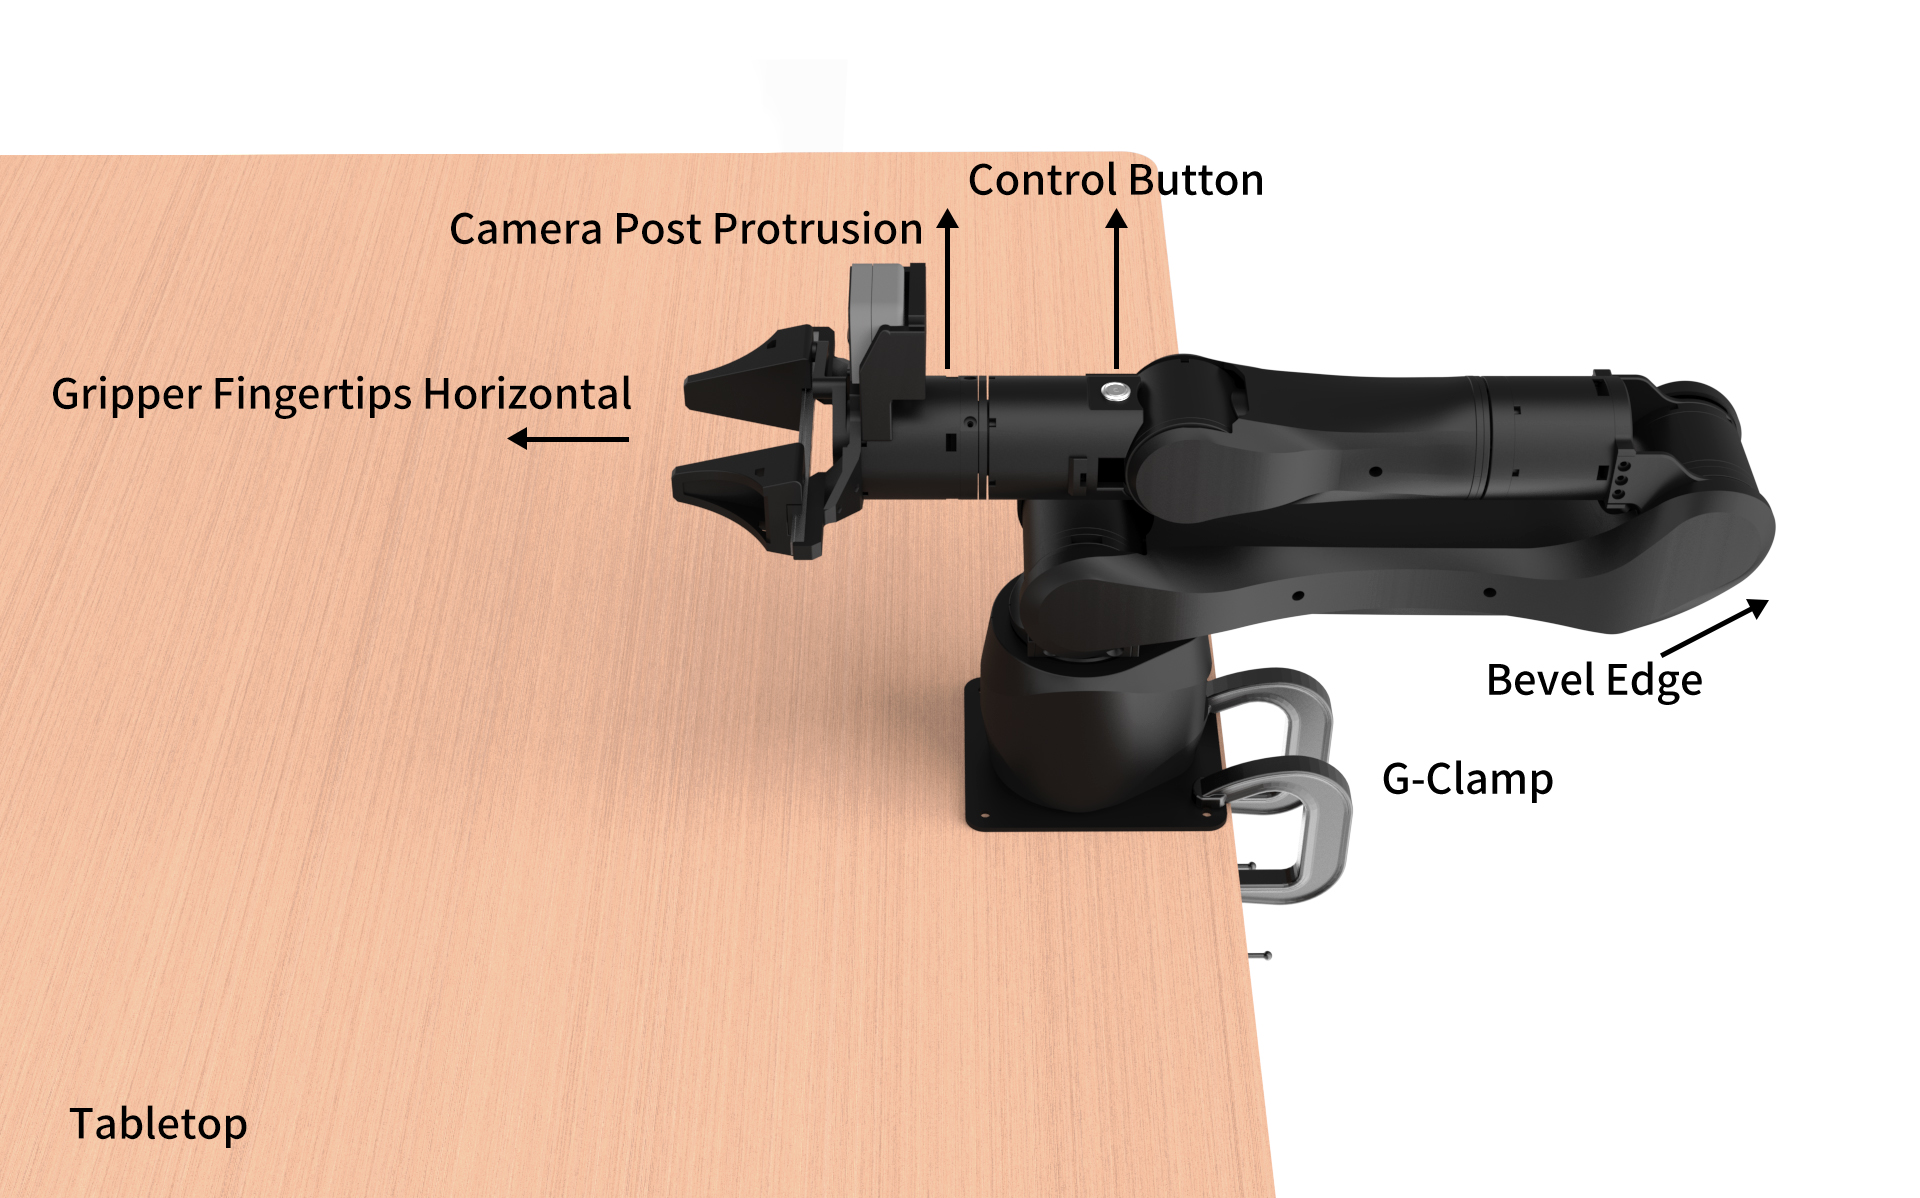
Keep the follower arm in its standard working pose and use a G-clamp to fix it to the edge of the table, waiting for use.
-
Before each use, the follower arm must be adjusted to the usage pose and ready to operate. It is strictly forbidden to start the device in any other pose, to prevent personal injury or product damage;
-
Users can make an auxiliary judgment by observing the gripper fingertip orientation, the protrusion direction of the camera column, the orientation of the control button, and the direction of the third joint's beveled edge, ensuring the robotic arm has accurately returned to its initial home state.
(2) Wiring and Startup
Plug the power cable into the power interface on the follower arm base plate, and use a USB-to-Type-C data cable to connect the follower arm's Type-C interface to the computer's USB interface to enable data communication. After power is applied, the robotic arm enters the working state.
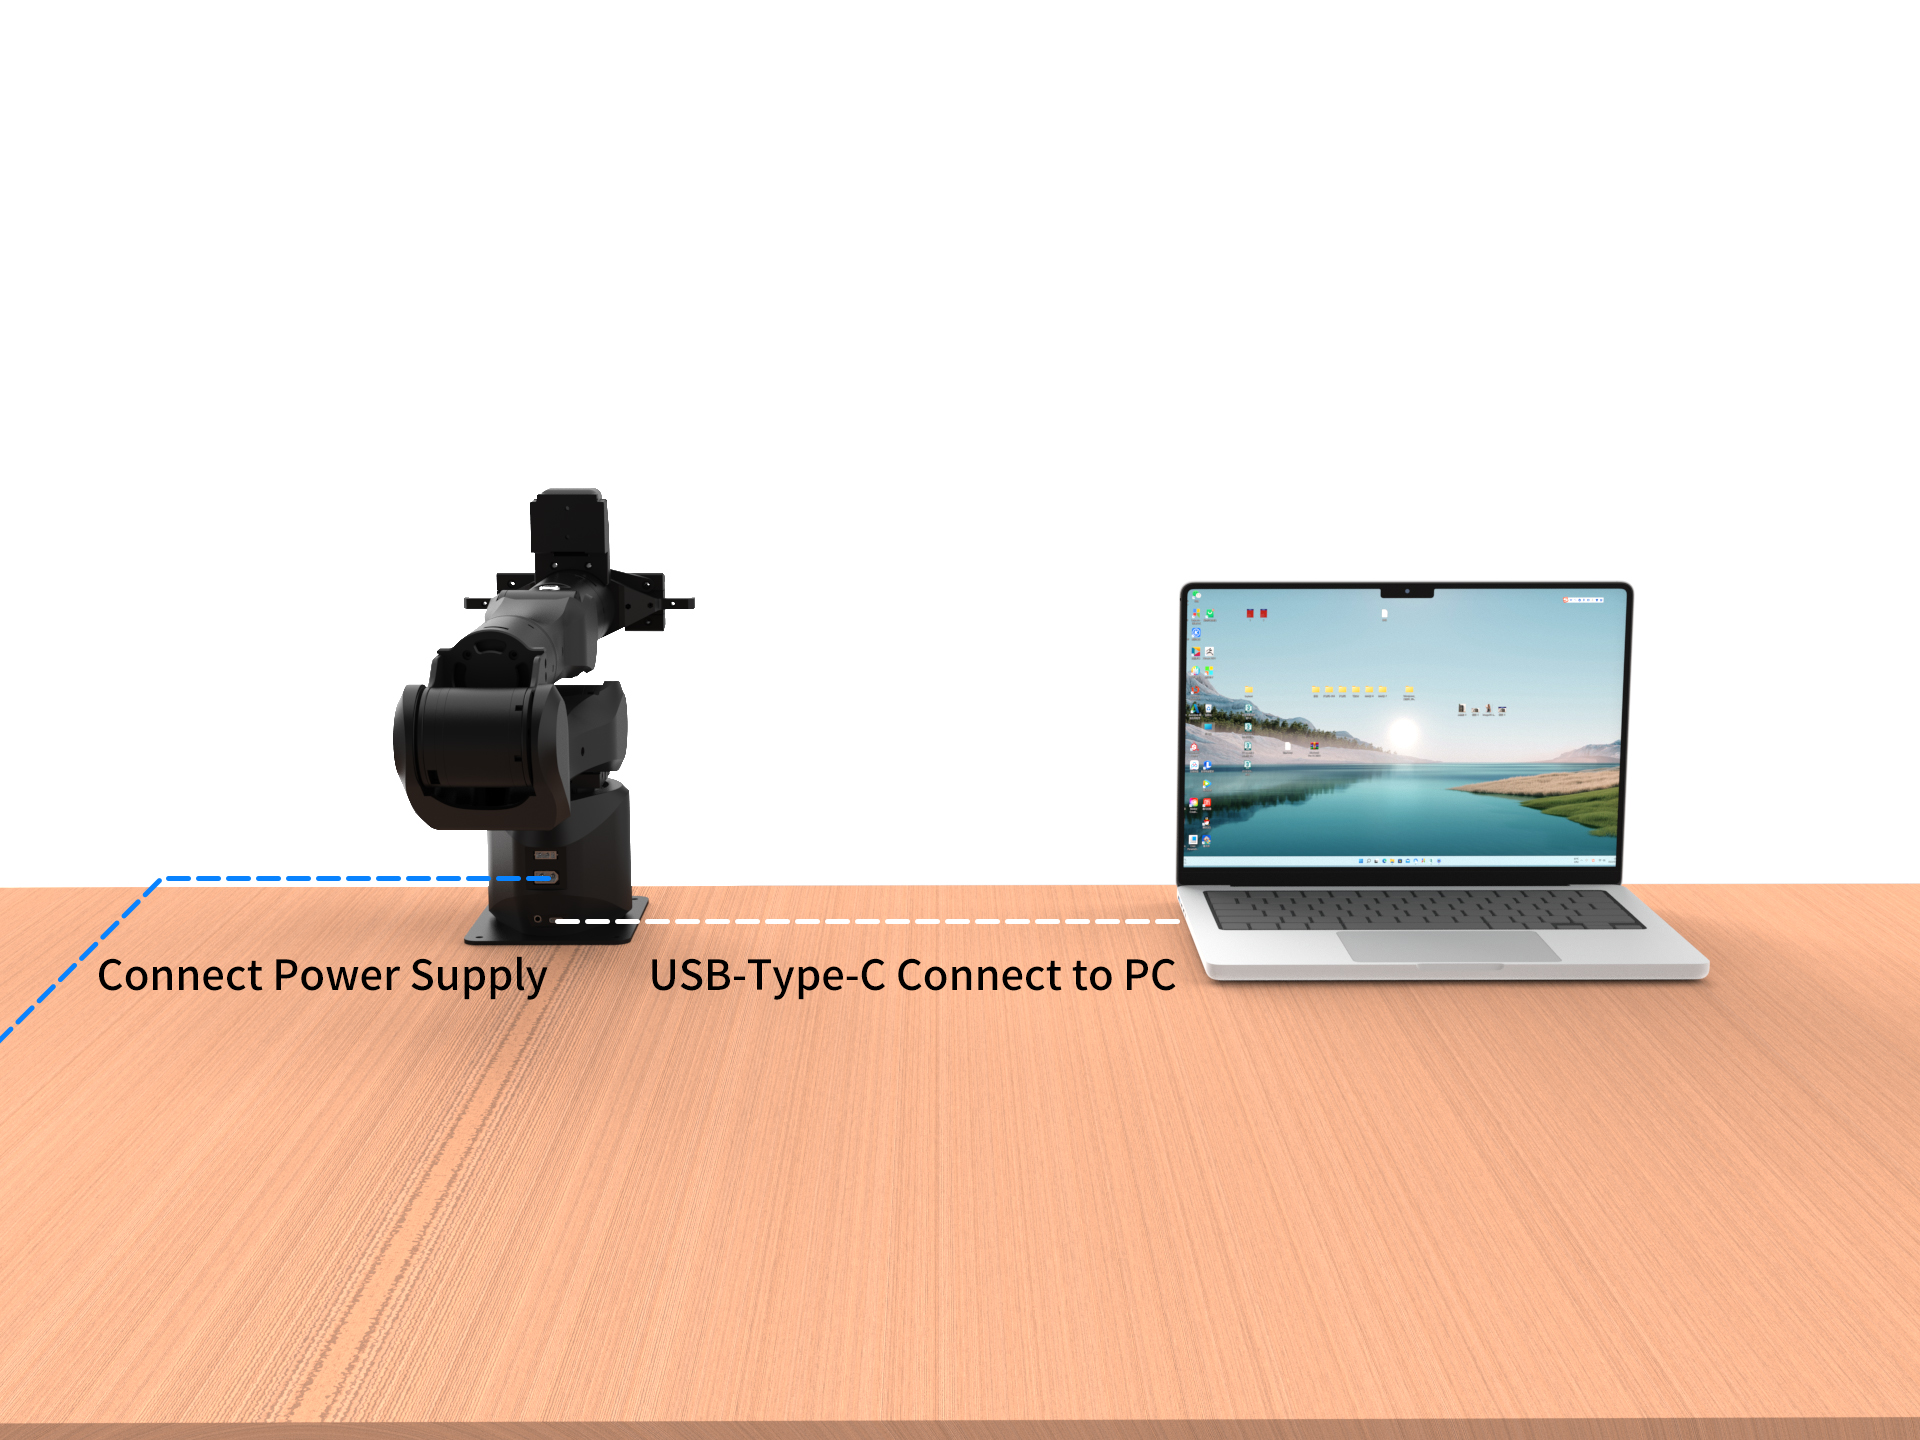
In addition to standalone single-arm operation, the follower arm can also work with Synria's in-house developed teaching arm system to enable functions such as teleoperation and imitation learning.
3. How to Use the Control Button
Lightly pressing the button switches the follower arm between MIT mode and PV mode, where PV mode has extremely high stiffness and MIT mode is more compliant.
In MIT mode:
-
Long-press the button for 1–2 seconds to enter the gravity compensation state;
-
Continue to long-press for more than 2 seconds; the ring-shaped green light on the button flashes, entering the draggable teaching state. In this state:
-
Lightly pressing the button exits draggable teaching;
-
After exiting, quickly double-clicking the button executes trajectory playback, and after playback completes, it automatically returns to MIT mode.
-
4. How to Use the Follower Arm
-
Confirm that each joint axis of the robotic arm is already at the zero position;
-
Check that all cable connections are secure and that the insulation sheathing is intact;
-
Wear the necessary safety protective equipment according to the actual working environment and operational requirements;
-
Unauthorized modification of the robotic arm is strictly prohibited. The company assumes no responsibility for any malfunction or accident caused by unauthorized modification;
-
Confirm that there are no people or obstacles within the robotic arm's range of motion to prevent collisions or other safety incidents;
-
It is strictly forbidden to use this product in harsh environments, including but not limited to dusty, high-temperature, sun-exposed, flammable, explosive, strongly corrosive, or underwater locations.
-
When operating, keep the speed low and the motions smooth to ensure the safety and controllability of the equipment;
-
Stay focused during operation and anticipate the robotic arm's direction and tendency of motion in advance;
-
Regularly check the operating status of the robotic arm and watch for any abnormal motion or noise;
-
All control commands must keep the robotic arm's range of motion confined within the safe working area; if an out-of-bounds condition occurs, stop operation immediately and cut off the power to prevent personal injury or equipment damage;
-
It is strictly forbidden to cut off power arbitrarily while the robotic arm is running, to avoid causing system failure or unexpected risks.
-
After operation, return the robotic arm to a safe position;
-
When turning off the power button, please support the robotic arm steadily to ensure it remains stable during power-off, preventing mechanical shock or damage;
-
Unplug the power plug and tidy up the cables properly;
-
Store the robotic arm in a dry, room-temperature environment, avoiding damage from moisture, high temperature, or other factors.