Ling Alicia-DL Leader Arm Python SDK
1. Introduction
Alicia-D SDK is a Python development toolkit for controlling the Ling Alicia-D series six-axis robotic arm (with gripper). This documentation is primarily aimed at the Leader Arm use case. The SDK is built on Xuanya's proprietary RoboCore robot core library and supports real-time reading of key data such as the Leader Arm's pose and operational status via serial communication.
1.1 Key Features
- Joint Control: Set and read the angles of six joints with smooth interpolated execution.
- End-Effector Trajectory: Support Cartesian-space end-effector pose trajectory planning.
- Gripper Control: Support precise angle control or one-click open/close.
- Torque Control: Enable or disable joint motor torque for free-dragging (teaching).
- Zero Calibration: Set the current position as the new zero point.
- State Reading: Retrieve joint angles, gripper angle, and end-effector pose in real time.
- Auto Serial Connection: Auto-detect serial port or manually specify.
- Teaching Mode: Drag and record pose points and replay the trajectory.
- Logging System: Supports log-level filtering to control console output verbosity.
2. Installation and Configuration
2.1 Requirements
- Python 3.11 or later
- A computer with serial port support (the USB-to-serial chip is integrated in the robot arm)
2.2 Installation Steps
Clone the repository and the corresponding examples:
git clone https://github.com/Synria-Robotics/Alicia-D-SDK.git -b v6.1.0
cd Alicia-D-SDK

# 2. Create a Python environment (Conda recommended)
conda create -n alicia python=3.11
conda activate alicia
Option 1: Install from Source (Development Mode)
If you need to modify the source code or contribute to development:
cd Alicia-D-SDK
pip install -e .
Option 2: Install from PyPI
pip install alicia_d_sdk
2.3 Quick Start
Basic usage example:
from alicia_d_sdk import create_robot

# Create a robot instance (auto-detects serial port and connects; auto_connect=True is the default)
robot = create_robot()

# Check connection status
if robot.is_connected():
    print("Connected successfully!")

    # Print current state
    robot.print_state()

    # Disconnect
    robot.disconnect()
else:
    print("Connection failed. Please check the serial port.")
Note: create_robot() connects automatically by default (auto_connect=True). To disable auto-connect:
# Manual connection control
robot = create_robot(auto_connect=False)
if robot.connect():
    # Use the robot
    robot.print_state()
    robot.disconnect()
Manually specify the serial port:
# Linux
robot = create_robot(port="/dev/ttyACM0")

# Windows
robot = create_robot(port="COM3")
2.4 Set Serial Port Permissions
On Linux systems, you need to configure access permissions for USB serial devices (Windows and macOS users can skip this step).
# Method 1: Add user to dialout group (recommended, permanent)
sudo usermod -a -G dialout $USER
# Note: You must log out and log back in for group permissions to take effect.

# Method 2: Temporarily set serial port permissions
sudo chmod 666 /dev/ttyACM*

# Method 3: Create a udev rule (permanent)
echo 'KERNEL=="ttyUSB*", MODE="0666"' | sudo tee /etc/udev/rules.d/99-serial.rules
sudo udevadm control --reload-rules
sudo udevadm trigger
2.5 Hardware Connection and Verification
-
Connect the robot arm to the computer via USB.
-
Check whether the serial port is recognized by the system (on different platforms the device may appear as
COM*orttyACM*):Linux:
ls -l /dev/ttyACM*macOS:
ls /dev/cu.*Windows:
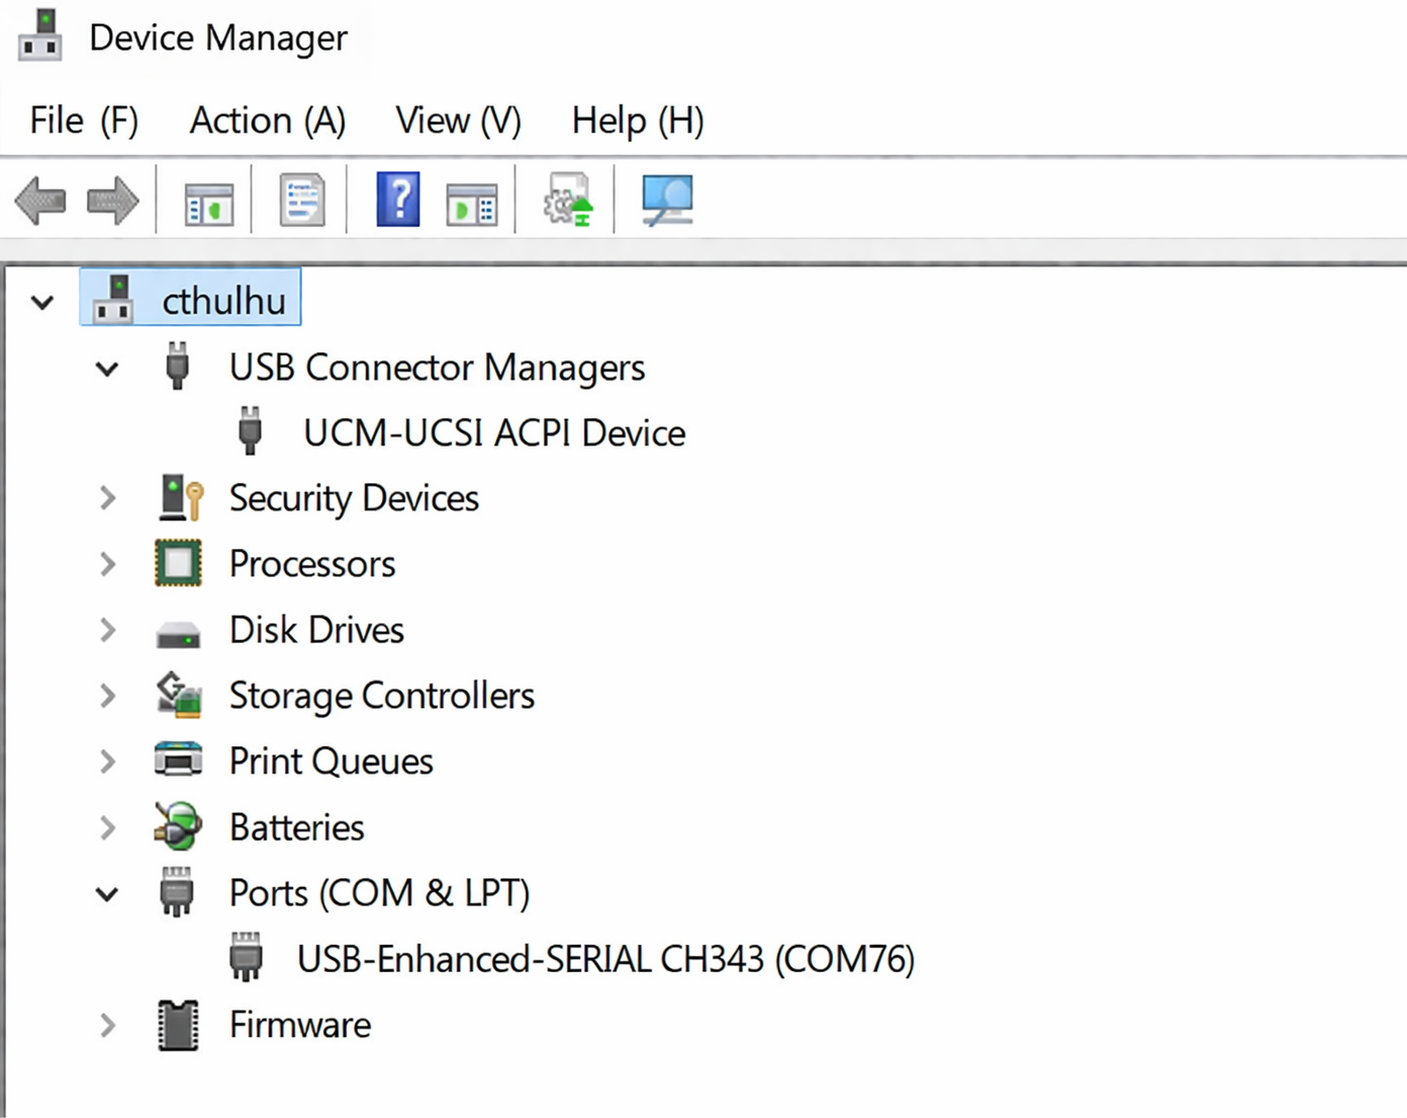
- Run the version-reading example to verify the connection:
If the connection is successful, the terminal will display the firmware version and other information of the robot arm.
cd examples
python3 00_demo_read_version.py
2.6 Troubleshooting
- Check hardware: Ensure the USB cable is securely connected and the robot arm is powered on.
- Check permissions: Confirm your user has access to the serial port device.
- Manually specify the port: If the SDK cannot auto-detect the port, specify it manually:
python3 00_demo_read_version.py --port /dev/ttyACM0
Serial Port Not Found / Connection Failed
- Check USB cable and power supply
- Linux users must ensure they are in the
dialoutgroup:sudo usermod -a -G dialout $USER
# Then log back in - Run
00_demo_read_version.pyto detect the firmware version
Permission Error (Permission denied)
- Try running with
sudoor check the user's serial port permissions - Linux: Ensure the user is in the dialout group
- Check if the serial port is occupied by another program
Firmware Version Detection Failed
- Run
00_demo_read_version.pymultiple times - Check whether the serial connection is stable
2.7 Dependency Overview
Main dependencies:
pyserial: Serial communicationnumpy: Numerical computationpycrc: CRC checksumrobocore: Kinematics and trajectory planning (installed automatically)
3. Example Code Description
The examples/ directory contains several demo scripts showing how to interact with the Leader Arm using the Alicia-D SDK. Some features in the examples are only applicable to the Follower Arm, as noted in the descriptions. All scripts support --port and --baudrate parameters.
3.1 File Structure
For Leader Arm use cases, you generally only need scripts 00 to 03 (version reading, torque control, zero calibration, state reading). The remaining examples are mainly for Follower Arm motion control and trajectory planning.
examples/
├── 00_demo_read_version.py          # Read firmware version              ✅ Common for Leader Arm
├── 01_torque_switch.py              # Torque control                     ✅ Common for Leader Arm
├── 02_demo_zero_calibration.py      # Zero calibration                   ✅ Common for Leader Arm
├── 03_demo_read_state.py            # Read state                         ✅ Common for Leader Arm
├── 04_demo_move_gripper.py          # Gripper control (Follower Arm only)
├── 05_demo_move_joint.py            # Joint-space motion (Follower Arm only)
├── 06_demo_forward_kinematics.py    # Forward kinematics
├── 07_demo_inverse_kinematics.py    # Inverse kinematics (Follower Arm only)
├── 08_demo_drag_teaching.py         # Drag teaching (Follower Arm only)
├── 09_demo_joint_traj.py            # Joint-space trajectory planning (Follower Arm only)
├── 10_demo_cartesian_traj.py        # Cartesian-space trajectory planning (Follower Arm only)
├── 11_benchmark_read_joints.py      # Joint reading performance benchmark
└── 12_utmostFPS.py                  # Maximum FPS test
3.2 Main Parameter Description
Most example scripts share a common set of command-line parameters for configuration and debugging.
| Parameter | Type | Default | Description |
|---|---|---|---|
--port | str | /dev/ttyACM0 | Specify the serial port number for the robot arm connection, e.g., /dev/ttyUSB0. If the system recognizes the device as a modem-class device, it may appear as /dev/ttyACM0. |
--gripper_type | str | 50mm | Gripper model. |
Some example scripts include parameters for specific features:
--format: Angle display format;rad(radians) ordeg(degrees), defaultdeg--single: Print state once (only for state-reading scripts)--mode: Drag teaching mode;manual,auto, orreplay_only--save-motion: Motion name (for drag teaching)--list-motions: List all available motions (drag teaching)--speed_deg_s: Joint motion speed (degrees/second), default 10, range 5–400--execute: Execute movement to target position (inverse kinematics example)
3.3 Core Features
00_demo_read_version.py
Read the robot arm firmware version
- Run this script to detect the firmware version.
Usage:
python 00_demo_read_version.py
01_torque_switch.py
Toggle the torque state (on/off) for all joints of the robot arm
Parameter:
--port: Serial port (optional)
Function:
- First disables torque, then re-enables it
- With torque off, the arm can be manually dragged
- Re-enable torque after teaching is complete
Notes:
- Before disabling torque, manually support the arm to prevent it from dropping suddenly
- Always re-enable torque after teaching is complete
Usage:
python 01_torque_switch.py
Note: The Leader Arm generally does not require torque control; this example is mainly for the Follower Arm.
02_demo_zero_calibration.py
Set the robot arm's current position as the new zero point
This operation is irreversible. Use with caution.
Parameter:
--port: Serial port (optional)
Use cases:
- First use of the robot arm or after a long period of non-use
- When joint angles show deviation
- When a new zero-point reference needs to be established
Usage:
python 02_demo_zero_calibration.py
03_demo_read_state.py
Continuously read and print the robot arm's joint angles, end-effector pose, and gripper state
Supports both single-shot and continuous printing modes.
Parameters:
--port: Serial port (optional)--gripper_type: Gripper model, default50mm--format: Angle display format;rad(radians) ordeg(degrees), defaultdeg--single: Print state once; default is continuous printing
Use cases:
- Debugging and troubleshooting
- Real-time monitoring of robot arm state
- Verifying the effect of control commands
Usage:
# Continuous printing (press Ctrl+C to stop)
python 03_demo_read_state.py  --gripper_type 50mm

# Print state once
python 03_demo_read_state.py --single
4. API Reference
This section describes the core classes and method interfaces of the Alicia-D SDK. All interfaces below apply to the Leader Arm; some control interfaces (such as joint motion and gripper control) are mainly used in Follower Arm scenarios.
4.1 Initialization Interface: create_robot
from alicia_d_sdk import create_robot

robot = create_robot(
    port="",                    # Serial port (leave blank for auto-detection)
    gripper_type=None,          # Gripper type ("50mm" or "100mm"); if None, reads from cache file or defaults to "50mm"
    debug_mode=False,           # Debug mode
    auto_connect=True,          # Auto connect
    base_link="base_link",      # Base link name
    end_link="tool0",           # End-effector link name
    backend=None,               # Computation backend: 'numpy' or 'torch' (default: None, uses 'numpy')
    device="cpu"                # Torch backend device: 'cpu' or 'cuda' (default: 'cpu')
)
4.2 Control Interface: SynriaRobotAPI
from alicia_d_sdk import create_robot

robot = create_robot()
Connection Management:
-
connect()
Connect to the robot arm and detect the firmware version -
disconnect()
Disconnect from the robot arm and stop the update thread -
is_connected()
Check whether the robot arm is connected
State Retrieval:
-
get_robot_state(info_type="joint_gripper", timeout=1.0, cache=True)
Unified robot state retrieval interface; returns different types of data based oninfo_type:Parameters:
info_type: Information type; options:"joint_gripper": Returns aJointStateobject (default), containing:angles: List of six joint angles (radians)gripper: Gripper opening value (0–1000; 0 = fully closed, 1000 = fully open)timestamp: Timestamp (seconds)run_status_text: Run status text ("idle","locked","sync","sync_locked","overheat","overheat_protect","unknown")
"joint": Returns only the joint angle listList[float](radians)"gripper": Returns only the gripper valuefloat(0–1000)"version": Returns a version info dict containingserial_number,hardware_version,firmware_version"temperature": Returns a list of servo temperaturesList[float](°C)"velocity": Returns a list of servo velocitiesList[float](degrees/second)"self_check": Returns a self-check status dict containingraw_mask,bits,timestamp"gripper_type": Returns gripper type string (e.g.,"50mm"or"100mm"); returns None on failure
timeout: Maximum wait time (seconds), default 1.0cache: Whether to use cache (only effective forgripper_type), default True
Return value: Returns the corresponding type based on
info_type; returnsNoneon failure -
get_pose(backend=None)
Get the current end-effector position and orientation; returns a dict containingtransform,position,rotation,euler_xyz,quaternion_xyzwParameters:
backend: Computation backend;'numpy'or'torch'(default: None, uses the backend set at initialization)
Return value: Dict containing transform, position, rotation, euler_xyz, quaternion_xyzw; returns None on failure
-
print_state(continuous=False, output_format='deg', fps=200.0)
Print current robot arm information; can print continuously; supports degree/radian format. Includes joint angles, gripper state, end-effector pose, temperature, velocity, and more.Parameters:
continuous: If True, print continuously; if False, print once. Default Falseoutput_format: Angle format;'deg'(degrees) or'rad'(radians), default'deg'fps: Target frame rate for continuous mode (Hz), default 200.0
4.3 RoboCore Integration
The SDK integrates the RoboCore library for high-performance kinematics and trajectory planning:
Kinematics Functions (from robocore.kinematics):
forward_kinematics(robot_model, q, backend='numpy', return_end=True)inverse_kinematics(robot_model, pose, q_init, backend='numpy', method='dls', ...)jacobian(robot_model, q, backend='numpy', method='analytic')