Virtual Teleoperation MuJoCo
1. Introduction
This document describes how to use the Ling Alicia-DL Leader Arm (physical hardware) to teleoperate a virtual Follower Arm in MuJoCo. This approach is suitable for the following scenarios:
- Validating the teleoperation workflow when no physical Follower Arm is available
- Debugging Leader Arm input, gripper mapping, and control logic
- Rapidly developing MuJoCo simulation scenes, models, and interaction logic
- Serving as a integration environment before connecting to a real Follower Arm
The teleoperation toolkit is Teleoperation-SDK, which provides two ready-to-use demos:
| Demo | Function |
|---|---|
01_demo_realtime_joint_plot.py | Real-time joint angle plotting and controller input state display |
02_demo_mujoco_follower.py | Teleoperation from Leader Arm to virtual MuJoCo Follower Arm |
2. Expected Results
After launch, two input/output channels are involved simultaneously:
- Input side: The Ling Alicia-DL Leader Arm (physical) sends real-time joint angles and controller state to the computer via USB serial
- Simulation side: MuJoCo loads the virtual Follower Arm model and updates its display in real time according to the Leader Arm's pose
Workflow:
- Connect the Leader Arm to the computer and confirm the serial device is correctly recognized by the system.
- Launch the MuJoCo teleoperation demo and wait for the simulation window to finish loading.
- Observe the initial pose of the virtual robot arm in the simulation window and confirm the model displays correctly.
- Hold the left button to enable teleoperation; hold the right button to lock the physical Leader Arm if needed.
- Slowly drag the Leader Arm and observe whether the virtual Follower Arm responds synchronously.
- Use the trigger to control gripper opening/closing and check that gripper mapping is correct.
For the first integration test, it is recommended to run 01_demo_realtime_joint_plot.py first to confirm that serial reading and button states are normal, then launch 02_demo_mujoco_follower.py to enter the 3D simulation.
3. Requirements
| Item | Requirement |
|---|---|
| Operating System | Ubuntu 20.04 / 22.04; Ubuntu recommended |
| Python | 3.10 – 3.12; 3.11 recommended |
| Hardware | Ling Alicia-DL Leader Arm, USB serial connection |
| GPU | Optional. Only affects the installation method for torch |
Although Python dependencies may install successfully in some Windows environments, the complete teleoperation pipeline for MuJoCo virtual teleoperation is still recommended to be validated on Ubuntu to reduce issues with graphics interface, serial port permissions, and dependency compatibility.
4. Project Structure
The main directory structure of Teleoperation-SDK:
Teleoperation-SDK/
├── 01_demo_realtime_joint_plot.py
├── 02_demo_mujoco_follower.py
├── assets/
│   └── mujoco/
│       └── Alicia_D_v5_6/
│           └── gripper_50mm/
│               ├── alicia_d_follower.xml
│               ├── base_link.STL
│               ├── link1.STL ~ link6.STL
│               ├── left_gripper_50mm.STL
│               └── right_gripper_50mm.STL
├── teleop_utils/
│   ├── __init__.py
│   └── fps_utils.py
├── pyproject.toml
├── LICENSE
├── .gitignore
└── README.md
Where:
02_demo_mujoco_follower.pyis the core demo for this documentassets/mujoco/.../alicia_d_follower.xmlis the default MuJoCo model description file loaded at startupteleop_utils/fps_utils.pyprovides high-precision loop timing for stable control frequency
5. Installation and Configuration
5.1 Install Conda
If you have not installed Conda yet, please refer to the official installation instructions:
After installation, reopen the terminal and confirm the following command works:
conda --version
5.2 Get Source Code and Create Environment
git clone https://github.com/Synria-Robotics/Teleoperation-SDK.git
cd Teleoperation-SDK

conda create -n teleop python=3.11 -y
conda activate teleop
5.3 Installation Methods
Option 1: Install from Source
Suitable when you need to modify source code, review implementation details, or contribute to development.
pip install -e .
Option 2: Install from PyPI
Suitable when you only need to use the SDK directly.
pip install teleoperation-sdk
- If you need to debug, modify code, replace models, or extend teleoperation logic, use
pip install -e . - If you only need to run the official demos, PyPI installation is sufficient
5.4 Dependency Verification
After installation, run the following command to check that all key dependencies are present:
python -c "
import torch, numpy, matplotlib, mujoco, alicia_d_sdk, serial
print('torch         ', torch.__version__)
print('numpy         ', numpy.__version__)
print('matplotlib    ', matplotlib.__version__)
print('mujoco        ', mujoco.__version__)
print('alicia_d_sdk  OK')
print('pyserial      OK')
print()
print('All dependencies installed successfully!')
"
If all outputs are normal and no errors occur, the runtime environment is ready.
5.5 Serial Port Permission Configuration
When using Linux for the first time, add serial port access permissions for the current user:
sudo usermod -aG dialout $USER
After executing, log out and log back in; otherwise the permissions will not take effect immediately.
If this step is skipped, the following error may appear at runtime:
Permission denied: '/dev/ttyACM0'
6. Quick Start
6.1 Pre-Launch Checklist
Before launching, confirm:
- The correct Conda environment is activated
- The Leader Arm is connected to the computer via USB
- The current terminal has serial port access permissions
- The MuJoCo graphical interface can open normally
6.2 Check Leader Arm Input First
It is recommended to run the real-time monitoring script first:
python 01_demo_realtime_joint_plot.py
A matplotlib window will pop up displaying:
- Real-time angle curves for 6 joints
- Controller input state
- Current sampling update status
If this demo cannot read pose or button state correctly, resolve serial port, permission, or dependency issues before proceeding to MuJoCo teleoperation.
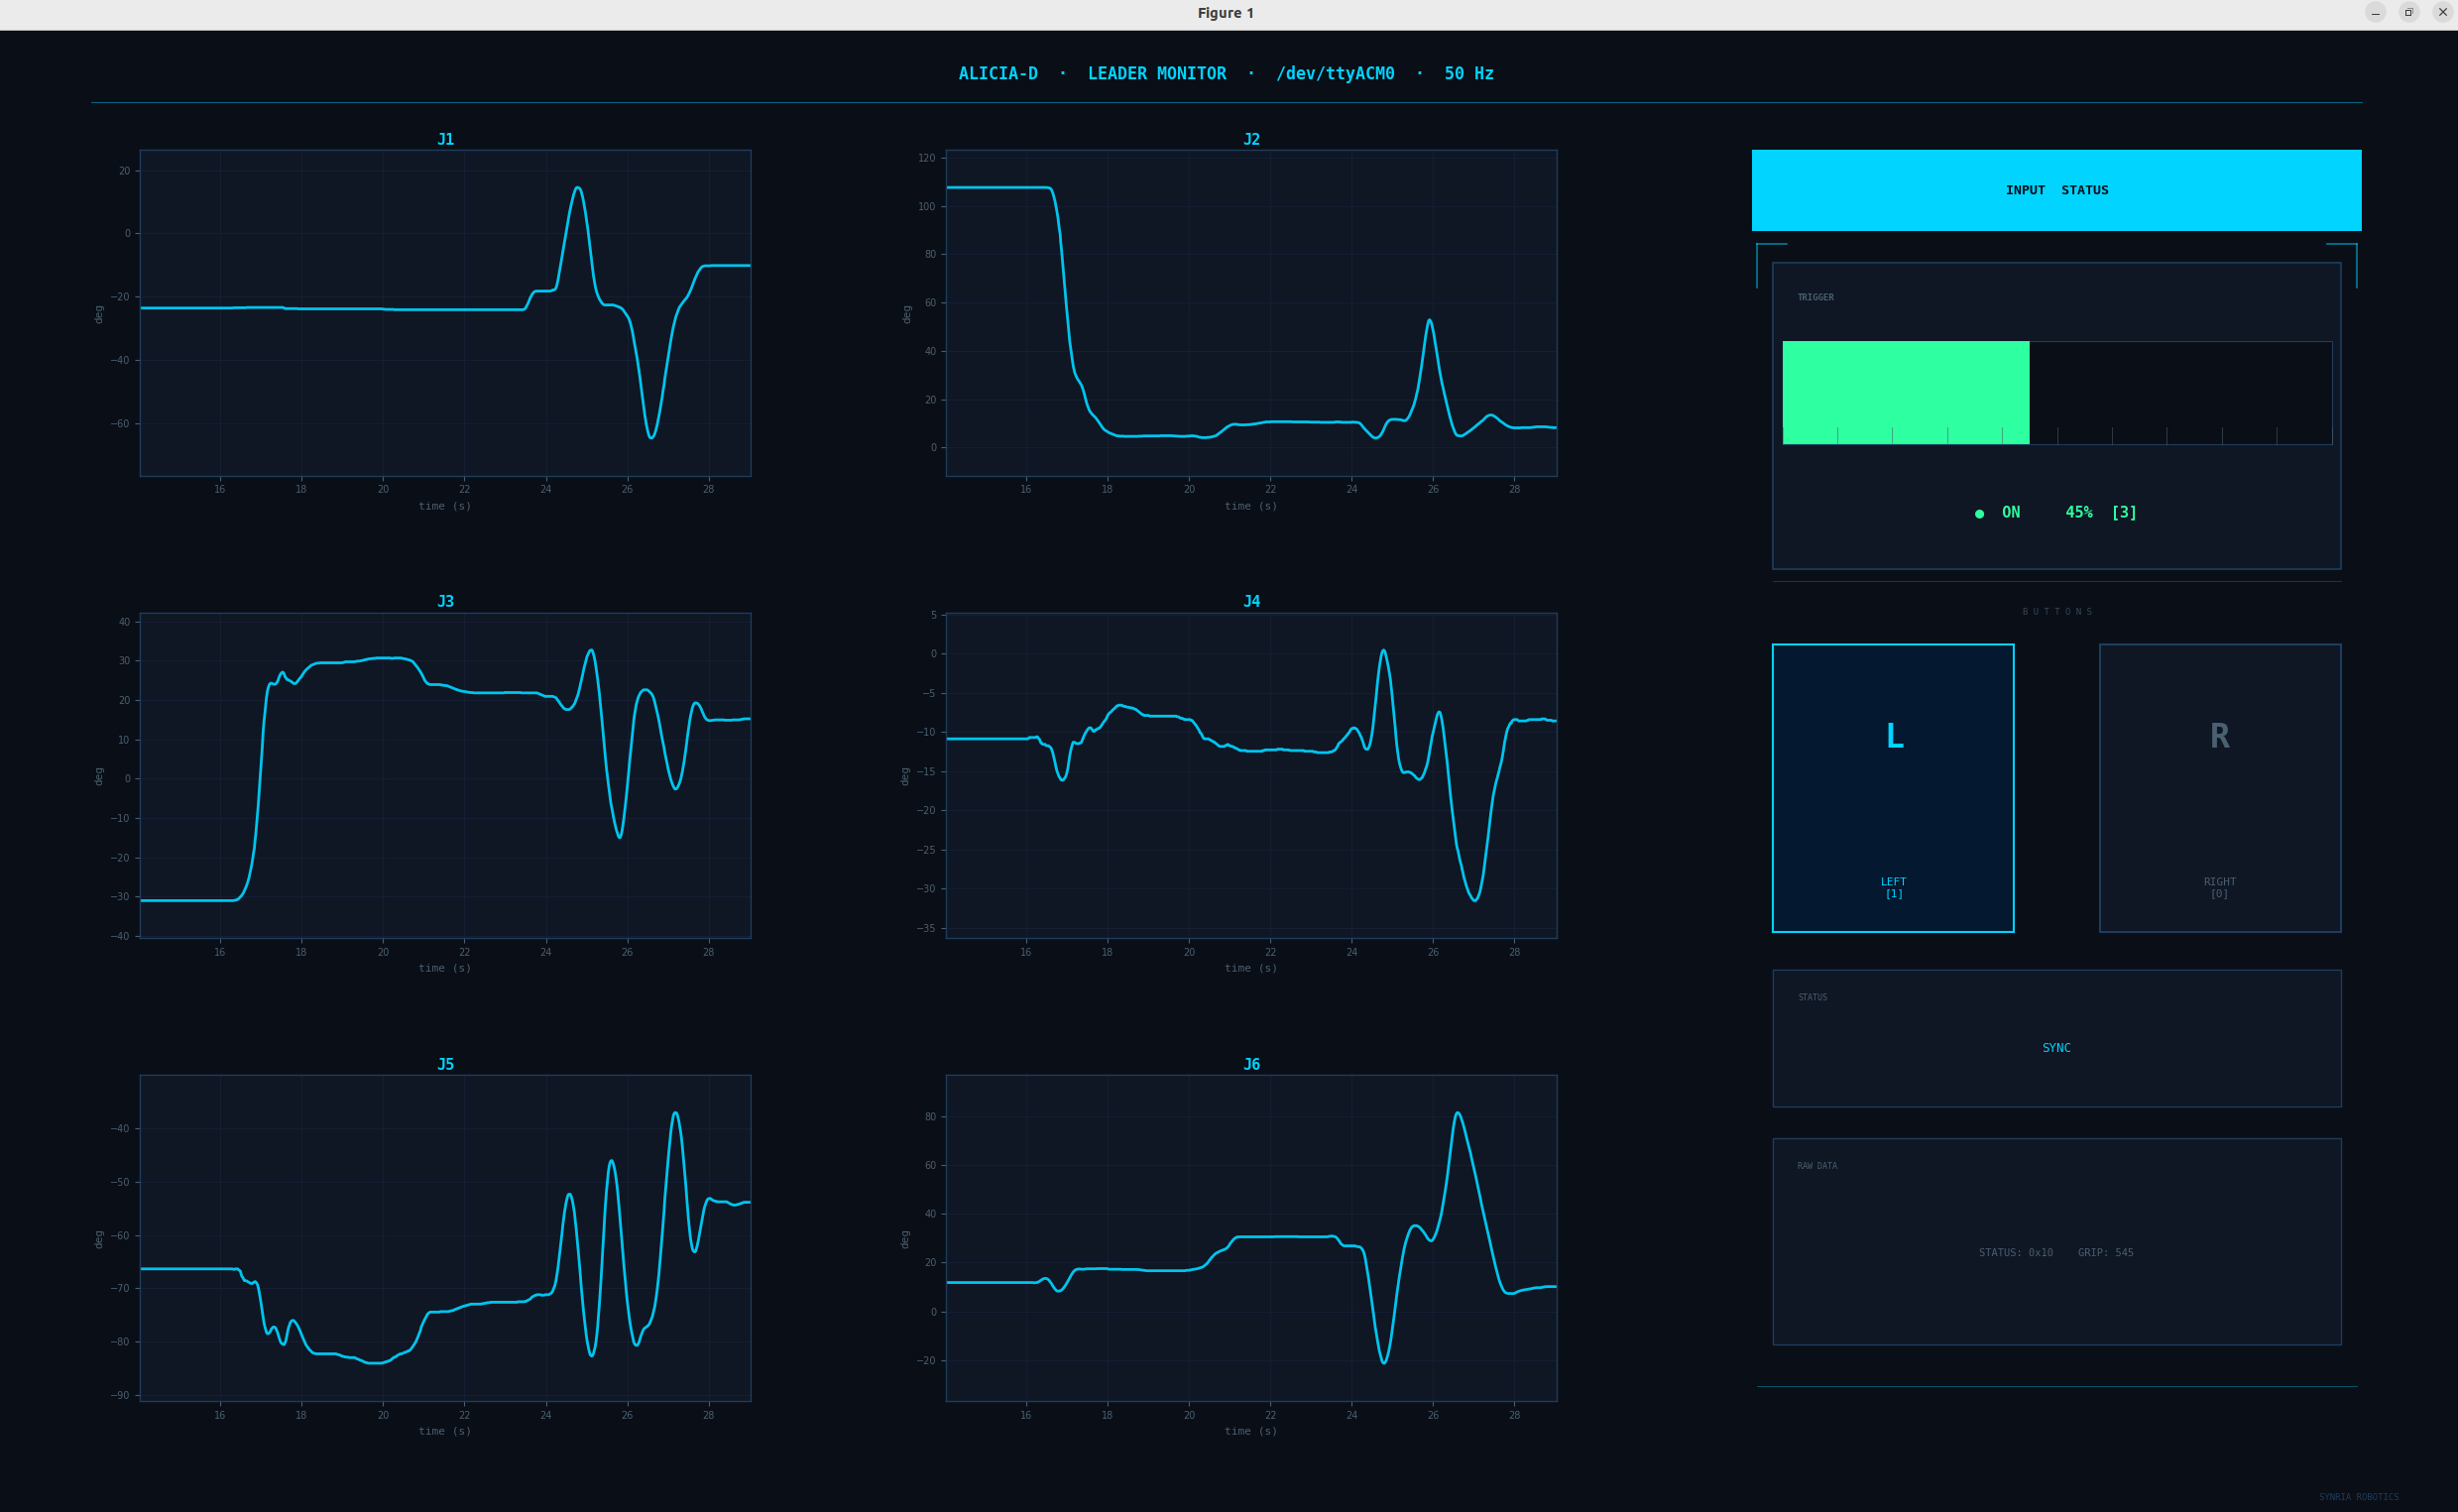
Demo 01 Interface
6.3 Launch MuJoCo Virtual Teleoperation
python 02_demo_mujoco_follower.py
Under normal conditions, a MuJoCo 3D window will pop up and load the built-in virtual Follower Arm model. At this point, the Leader Arm's motion is continuously read, but the virtual robot arm only executes teleoperation when the interaction conditions are met.
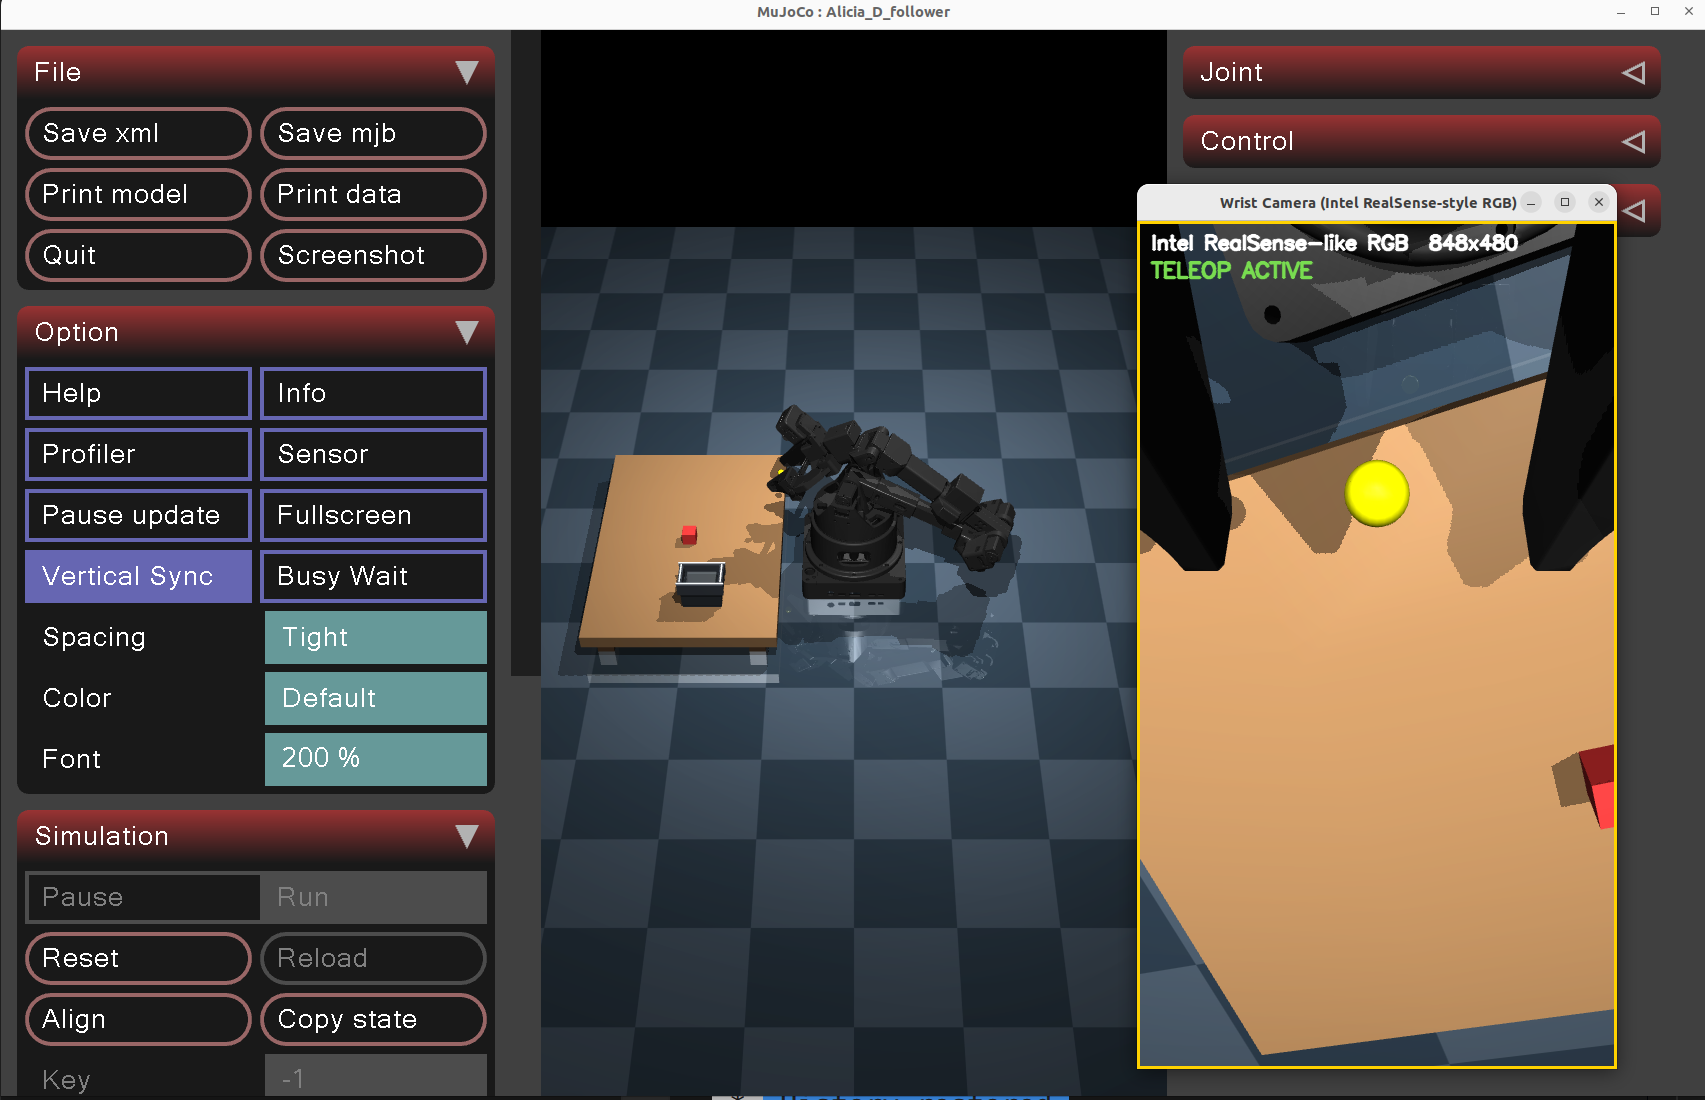
Demo 02 Interface
7. Interaction Guide
7.1 Basic Operations
| Action | Effect |
|---|---|
| Left Button | Enable/disable teleoperation |
| Right Button | Lock the physical Leader Arm |
| Trigger | Control gripper opening/closing range |
Press R | Reload the MuJoCo XML model |
| Close Window | Exit the program |
7.2 Recommended Operating Habits
- After launching the program, confirm the window displays correctly before moving the Leader Arm
- Before enabling teleoperation, place the Leader Arm in a natural, safe pose
- On first use, move each joint slowly to confirm mapping direction and range are correct
- After modifying XML or mesh files, use
Rto reload for verification
8. FAQ
8.1 Dependency Error at Startup
| Error Message | Cause | Solution |
|---|---|---|
ImportError: torch_utils requires PyTorch | torch not installed | Run pip install . or pip install -e . in the repository directory |
ModuleNotFoundError: No module named 'torch' | torch not installed | Same as above |
ModuleNotFoundError: No module named 'mujoco' | MuJoCo Python package not installed | Re-run the installation steps |
ModuleNotFoundError: No module named 'alicia_d_sdk' | SDK not installed | Re-run the installation steps |
Permission denied: '/dev/ttyACM0' | Insufficient serial port permissions | See serial port permission configuration above |
device disconnected or multiple access on port | Device not connected or port occupied | Check USB connection and close other programs occupying the port |
8.2 Can the MuJoCo Demo Run Without a Connected Robot Arm?
The program can start and the MuJoCo window will usually open, but since there is no Leader Arm input available, the terminal will continuously print serial-related errors and the virtual robot arm cannot be controlled.
If your goal is only to check whether the XML scene renders correctly, this approach can still be used for static verification.
8.3 What Options Does --variant Support?
The following options are supported:
leadergripper_50mmgripper_100mmleader_urvertical_50mm
When switching hardware configurations or gripper sizes, ensure the parameter setting matches the actual device.
8.4 Why Is It Recommended to Run Demo 01 First?
Because Demo 01 makes it easier to locate the source of problems:
- If Demo 01 cannot read joint angles, the issue is usually with the serial port, permissions, or SDK installation
- If Demo 01 runs correctly but Demo 02 does not, the problem is typically in the MuJoCo environment, model files, or the graphics interface
This significantly reduces troubleshooting time.
9. Dependency Tree
Teleoperation-SDK
├── numpy
├── matplotlib
├── mujoco >= 3.0
├── pyserial
└── alicia_d_sdk
	└── synria-robocore
		└── torch
Where:
numpyis used for numerical computationmatplotlibis used for real-time curve displaymujocois used for 3D simulation and model loadingpyserialis used for serial communicationalicia_d_sdkis used for reading Leader Arm state and integrating teleoperation logictorchis indirectly introduced via downstream dependencies; therefore, in some scenarios it must be properly installed even when deep learning features are not directly used
10. Recommended Debug Workflow
If you are new to this toolchain, follow this sequence:
- Install Conda and set up the Python environment
- Install Teleoperation-SDK via
pip install -e . - Run the dependency verification command
- Connect the Leader Arm and confirm the serial port number is correct
- Run
01_demo_realtime_joint_plot.pyto check joint and button state - Run
02_demo_mujoco_follower.pyto open the MuJoCo simulation - Hold the left button and slowly drag the Leader Arm to confirm the mapping is correct
- Modify the XML and use
Rto verify scene reloading
11. Related Documentation
- Installation and Usage Guide
- Ling Alicia-DL Leader Arm Python SDK
- Leader Arm Teleoperation Extension Examples
Through the above documentation, you can further complete basic Leader Arm usage, SDK development, and teleoperation extension for third-party robot arms.