Installation and Usage Guide
1. Interface and Button Descriptions
The figure below shows the descriptions of the interfaces on the follower arm's base plate:
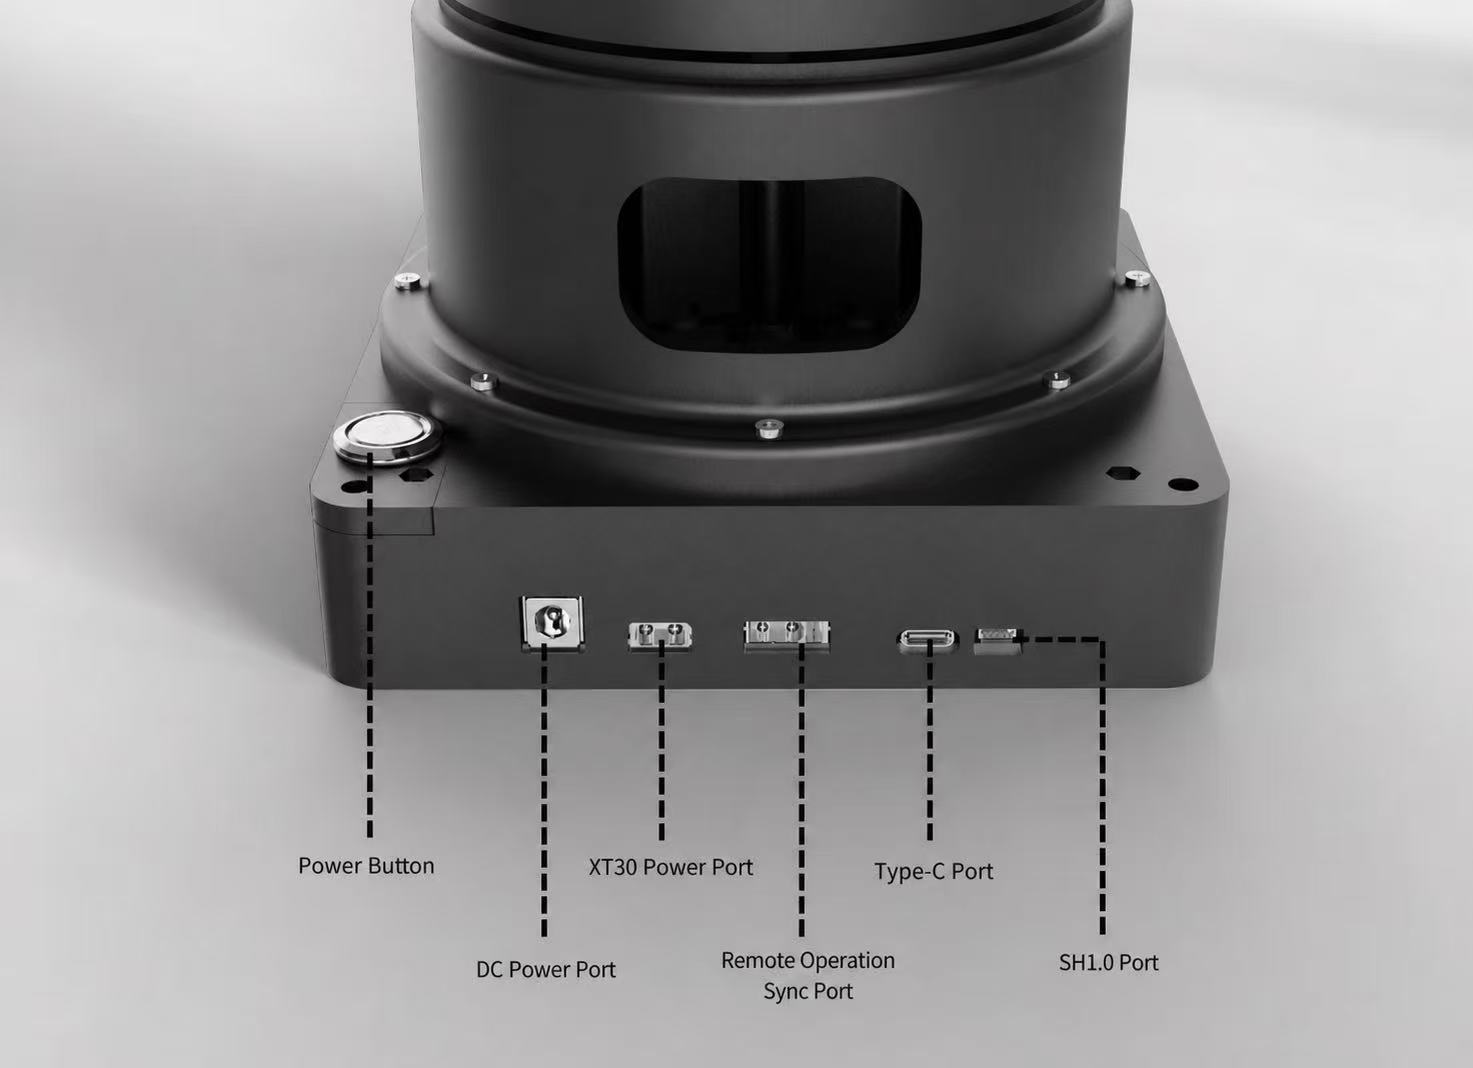
The SH1.0 interface on the follower arm is a debugging interface reserved exclusively for developers; users should not use it. Any unauthorized self-connection or development activity that results in product damage will not be covered by warranty or supported under after-sales service!
2. Follower Arm Installation Guide
(1) Positioning the Robotic Arm
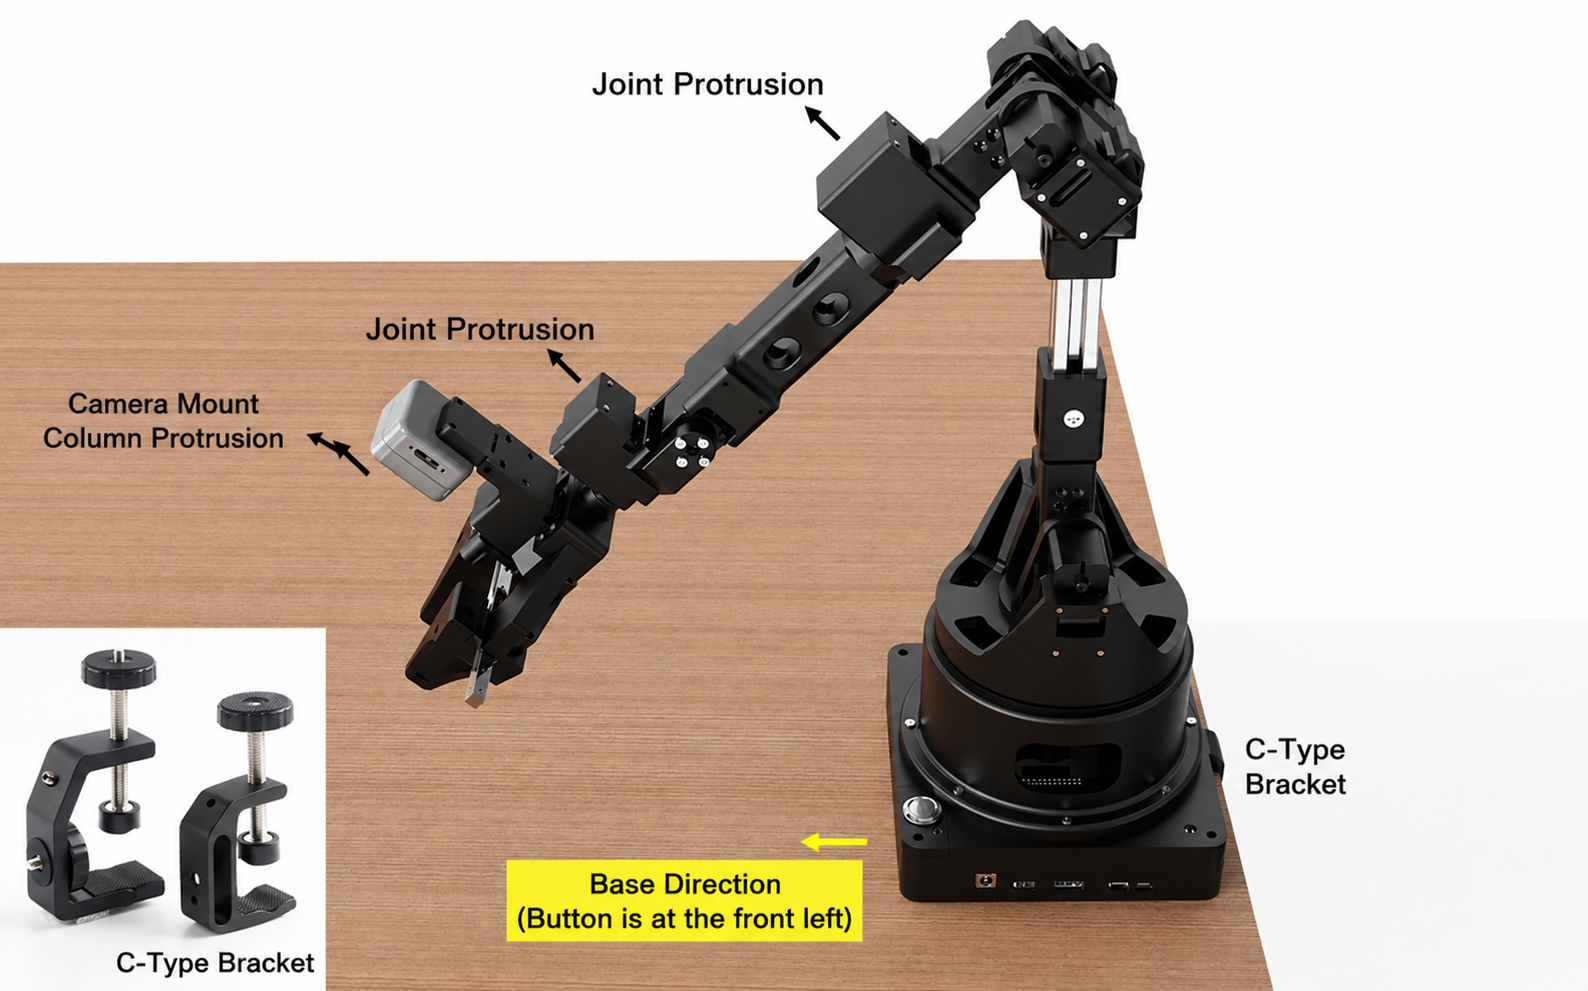
Keep the follower arm in the standard working posture and use the C-shaped bracket to fix it to the edge of the desk, ready for use.
-
Before each use, the follower arm must be adjusted to the operating posture in standby; it is strictly forbidden to power on the device in any other posture, to prevent injury to personnel or damage to the product;
-
The user can use the orientation of the two joint protrusions and the one camera-post protrusion, as well as the direction of the base, as auxiliary judgment: in the operating posture, the joint protrusions and the camera-post protrusion should point diagonally upward, with the power button at the front-left, ensuring the arm has been correctly homed.
(2) Wiring and Startup
Insert the power cable into the power interface on the follower arm's base plate, and use a USB-to-Type-C data cable to connect the follower arm's Type-C interface to the computer's USB interface to enable data communication. Once connected, press the metal power button on the base plate; the robotic arm will play a startup animation, indicating a successful start.
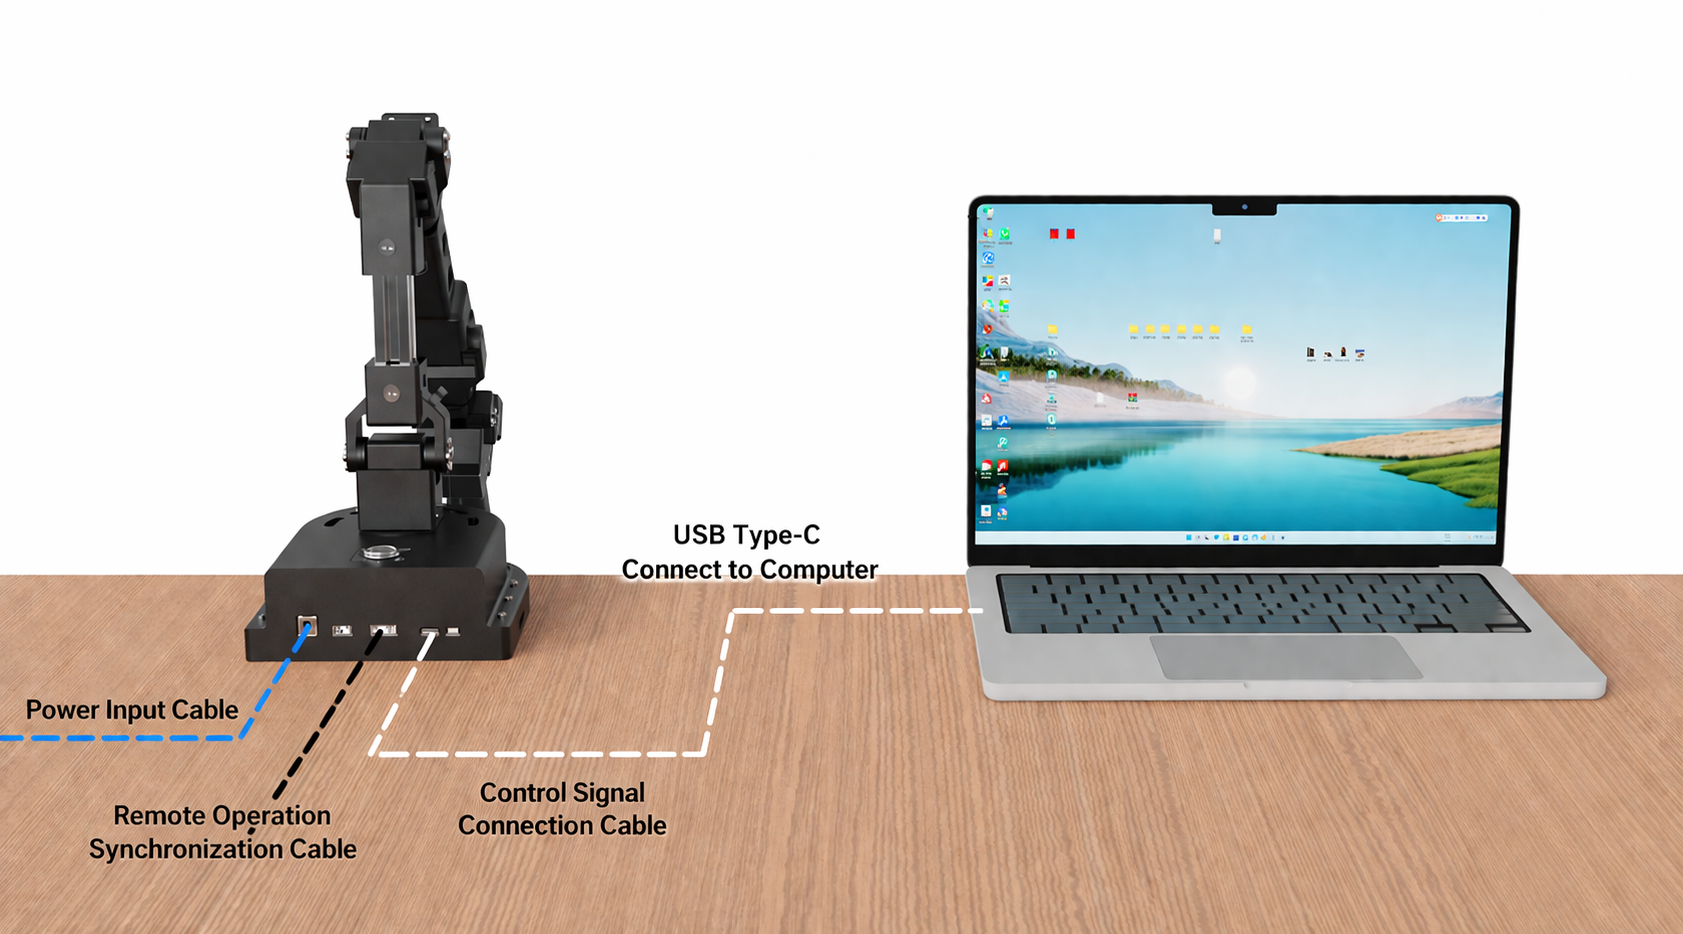
In addition to standalone single-arm operation, the follower arm can also work together with Synria's in-house leader-arm system to enable teleoperation, imitation learning, and other features.
3. Follower Arm Usage Method
-
Confirm that each joint axis of the robotic arm is already in the zero position;
-
Check that all cable connections are secure and that the insulation sheathing is intact and undamaged;
-
Wear the necessary safety protective equipment according to the actual working environment and operational needs;
-
It is strictly forbidden to modify the robotic arm without authorization; the company is not responsible for any malfunction or accident caused by unauthorized modification;
-
Confirm that there are no personnel or obstacles within the robotic arm's range of motion, to prevent collisions or other safety incidents;
-
It is strictly forbidden to use this product in harsh environments, including but not limited to dusty, high-temperature, direct-sunlight, flammable/explosive, highly corrosive, or underwater locations.
-
During operation, keep the speed low and the motion steady to ensure the safety and controllability of the equipment;
-
Stay focused during operation and anticipate the direction and trend of the robotic arm's motion in advance;
-
Regularly check the operating status of the robotic arm and watch for any abnormal motion or noise;
-
All control commands must ensure that the robotic arm's range of motion stays within the safe working zone; if it goes out of bounds, immediately stop the operation and cut off the power to prevent injury to personnel or damage to the equipment;
-
It is strictly forbidden to cut off power arbitrarily while the robotic arm is running, to avoid system failure or unexpected risks.
-
After the operation is complete, return the robotic arm to a safe position;
-
When turning off the power button, hold the robotic arm steady to ensure it remains stable during power-off, preventing mechanical shock or damage;
-
Unplug the power plug and properly organize the cables;
-
Store the robotic arm in a dry, room-temperature environment, avoiding damage from moisture, high temperature, and other factors.