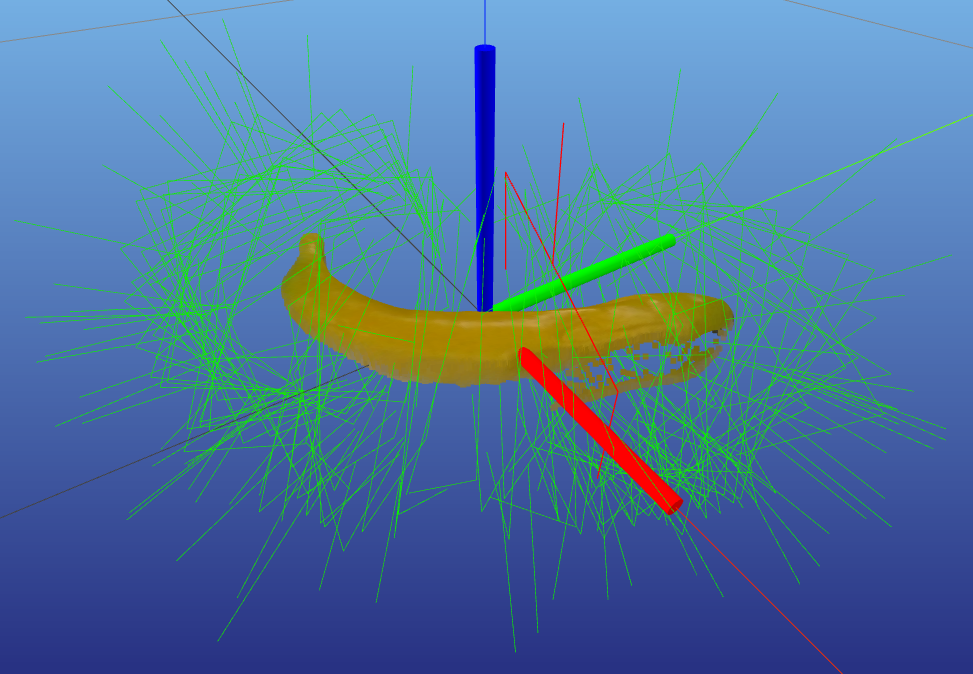
Ling Follower Arm ROS2 Humble
1. Introduction
Alicia-D ROS2 is a driver and control toolkit for the Ling Alicia-D series 6-axis robot arms (with gripper), developed for ROS 2 Humble. It supports joint motion control, gripper operation, and real-time pose and state reading via serial communication.


1.1 Key Features
- ros2_control Integration: Based on the standard ros2_control hardware interface, supports seamless integration with MoveIt2.
- MoveIt2 Support: Full MoveIt2 motion planning and execution capabilities.
- Joint Control: Supports setting and reading angles for six joints with smooth trajectory execution.
- Gripper Control: Supports precise position control, compatible with both 50mm and 100mm gripper types.
- Real-Time State Feedback: Real-time access to joint angles, gripper position, and robot state.
- Automatic Firmware Detection: Automatically detects firmware version.
- Serial Communication: Automatically searches for serial port or allows manual specification; supports high baud-rate communication.
- Zero Calibration: Sets the current position as the new zero point.
- Torque Switch: Enables or disables joint motor torque for free drag teaching.
1.2 Project Structure
alicia_d_driver/
├── include/alicia_d_driver/
│   ├── alicia_d_hardware_interface.hpp    # Hardware interface header
│   └── alicia_d_driver_node.hpp          # Standalone driver node
├── src/
│   ├── alicia_d_hardware_interface.cpp   # Hardware interface implementation
│   ├── alicia_d_driver_node.cpp          # Standalone driver
│   └── serial_communicator.cpp           # Serial communication
├── launch/
│   └── alicia_d_driver.launch.py         # Standalone driver launch
├── alicia_d_driver.xml                   # Plugin description
└── CMakeLists.txt

alicia_d_moveit/
├── config/
│   ├── alicia_d_descriptions.ros2_control.xacro  # Hardware interface configuration
│   ├── ros2_controllers.yaml                     # Controller configuration
│   ├── moveit_controllers.yaml                   # MoveIt controller mapping
│   └── ...                                       # Other MoveIt configurations
├── launch/
│   ├── real_robot.launch.py                      # Real robot launch
│   ├── demo.launch.py                            # Simulation launch
│   └── ...                                       # Other launch files
└── package.xml

alicia_d_calibration/       # Hand-eye calibration module

alicia_d_cube_sort/         # 2D grasping module (cube sorting)

alicia_d_6d_grasp/          # 6D grasping module
2. Quick Start
2.1 Set Serial Port Permissions
Method 1: Temporary serial port permission
sudo chmod 666 /dev/ttyACM*
Method 2: Add user to the dialout group (permanent)
sudo usermod -a -G dialout $USER
Note: Log out and log back in, or restart, for the permissions to take effect.
2.2 Get Source Code and Build
mkdir -p ~/alicia_ws/src
cd ~/alicia_ws
git clone https://github.com/Synria-Robotics/Alicia-D-ROS2.git -b v6.1.0rc1 ./src
rosdep install --from-paths src --ignore-src -r -y
colcon build
source install/setup.bash
3. Usage
3.1 Launch MoveIt Simulation
If a ROS 2 node is already running in the current terminal, press Ctrl+C to terminate it first, otherwise serial port occupation or topic conflicts may occur.
Enter the workspace and source the environment (required every time a new terminal is opened):
cd ~/alicia_ws
source install/setup.bash
Please confirm your gripper type:
If you have a 50mm gripper, you can launch with the default value:
ros2 launch alicia_d_moveit demo.launch.py
If you have a 100mm gripper, specify the gripper type:
ros2 launch alicia_d_moveit demo.launch.py gripper_type:=100mm
3.2 Launch MoveIt with Real Robot
If a ROS 2 node is already running in the current terminal, press Ctrl+C to terminate it first, otherwise serial port occupation or topic conflicts may occur.
cd ~/alicia_ws
source install/setup.bash
Use MoveIt to control the real robot arm:
Option 1: Basic launch (default parameters):
ros2 launch alicia_d_moveit real_robot.launch.py
Option 2: Launch with specified parameters:
ros2 launch alicia_d_moveit real_robot.launch.py \
    gripper_type:=50mm \
    port:=/dev/ttyACM0 \
    speed_deg_s:=30
MoveIt Launch Parameter Reference
| Parameter | Default | Description |
|---|---|---|
gripper_type | 50mm | Gripper type: 50mm or 100mm |
port | '' (empty string) | Serial device path, e.g. /dev/ttyACM0; leave empty for auto-detection |
speed_deg_s | 20 | Default joint motion speed (degrees/second) |
Note: The underlying driver automatically detects the firmware version and robot arm version (
v5_5/v5_6); manual specification is generally not required.
RViz Basic Operations
- Motion Planning: After launching the robot arm, an RViz window will appear. Drag the robot arm's end effector to the target position with the mouse, then click
Planin theMotionPlanningpanel at the lower left to plan the motion; clickExecuteto execute the plan. - Joint Control: In RViz, click the
Jointsmenu in theMotionPlanningpanel at the lower left, drag each joint'sValueto the target, then return to thePlanningmenu to executePlan/Execute. - Gripper Control: In RViz, expand the
Planning Groupitem in theMotionPlanningpanel at the lower left and selectGripper. Click theJointsmenu to set the gripper opening value. Return to thePlanningmenu to executePlan/Executeand observe the gripper change.
3.3 Standalone Driver Node (without MoveIt)
If a ROS 2 node is already running in the current terminal, press Ctrl+C to terminate it first, otherwise serial port occupation or topic conflicts may occur.
cd ~/alicia_ws
source install/setup.bash
The standalone driver node runs only the underlying driver without MoveIt, suitable for scenarios that only require basic joint/gripper control.
Option 1: Basic launch (default parameters):
ros2 launch alicia_d_driver alicia_d_driver.launch.py
Option 2: Launch with specified parameters:
ros2 launch alicia_d_driver alicia_d_driver.launch.py \
    port:=/dev/ttyACM0 \
    default_speed_deg_s:=30.0
Standalone Driver Parameter Reference
| Parameter | Default | Description |
|---|---|---|
port | '' (empty string) | Serial device path, e.g. /dev/ttyACM0; leave empty for auto-detection |
default_speed_deg_s | 20.0 | Default joint motion speed (degrees/second), range: 4.39–439.45 |
Standalone Driver Topics
Subscribed Topics:
/joint_commands(sensor_msgs/JointState): Send joint position and velocity commands/demonstration(std_msgs/Bool): Enable/disable teaching mode (zero torque)/zero_calibrate(std_msgs/Bool): Execute zero calibration
Published Topics:
/joint_states(sensor_msgs/JointState): Publish current joint state (position, velocity)
Usage Examples
Open a new terminal and run:
cd ~/alicia_ws
source install/setup.bash
1. Enable Teaching Mode (Zero Torque)
ros2 topic pub --once /demonstration std_msgs/msg/Bool "{data: true}"
2. Disable Teaching Mode (Restore Full Torque)
ros2 topic pub --once /demonstration std_msgs/msg/Bool "{data: false}"
3. Zero Calibration
-
First disable torque (enter teaching mode):
ros2 topic pub --once /demonstration std_msgs/msg/Bool "{data: true}" -
Manually move the robot arm to the desired zero pose
-
Execute zero calibration (torque is automatically restored after calibration):
ros2 topic pub --once /zero_calibrate std_msgs/msg/Bool "{data: true}"
4. Send Joint Commands
Send joint position and velocity commands via the /joint_commands topic.
Example 1: Move to zero position using default speed (20 degrees/second)
ros2 topic pub --once /joint_commands sensor_msgs/msg/JointState "
name: ['Joint1', 'Joint2', 'Joint3', 'Joint4', 'Joint5', 'Joint6', 'Gripper']
position: [0.0, 0.0, 0.0, 0.0, 0.0, 0.0, 500.0]
"
Example 2: Move with specified speed (30 degrees/second = 0.524 radians/second)
ros2 topic pub --once /joint_commands sensor_msgs/msg/JointState "
name: ['Joint1', 'Joint2', 'Joint3', 'Joint4', 'Joint5', 'Joint6', 'Gripper']
position: [0.785, 0.785, 0.0, 0.0, 0.0, 0.0, 500.0]
velocity: [0.524, 0.524, 0.524, 0.524, 0.524, 0.524, 0.0]
"
Example 3: Control gripper or a single joint independently
ros2 topic pub --once /joint_commands sensor_msgs/msg/JointState "
name: ['Gripper']
position: [500.0]
"
ros2 topic pub --once /joint_commands sensor_msgs/msg/JointState "
name: ['Joint1']
position: [0.524]
"
Unit Notes:
The /joint_commands topic uses the sensor_msgs/JointState message type, following ROS standard conventions:
- Joint position unit is radians (rad)
- Speed in the
velocityfield is in radians/second (rad/s)
Although the driver internally uses degrees/second (
speed_deg_s/default_speed_deg_s), the ROS message standard requires rad/s. The driver automatically converts rad/s to deg/s, so always provide speed values in rad/s.
Behavior Notes:
- If a rad/s speed value is provided, the driver converts it to deg/s and uses the maximum value as the common speed for all joints
- If no speed is provided, the
default_speed_deg_sparameter value (in degrees/second) is used - Gripper position range is 0–1000 (0 = fully open, 1000 = fully closed)
Speed Conversion Reference (for /joint_commands topic):
- 20 deg/s = 0.349 rad/s → use
velocity: [0.349, 0.349, ...] - 30 deg/s = 0.524 rad/s → use
velocity: [0.524, 0.524, ...] - 40 deg/s = 0.698 rad/s → use
velocity: [0.698, 0.698, ...] - 100 deg/s = 1.745 rad/s → use
velocity: [1.745, 1.745, ...]
Quick conversion formula: rad/s = deg/s × π / 180 or rad/s = deg/s × 0.0174533
5. Read Joint State Data
ros2 topic echo /joint_states
4. Example Files
4.1 Basic Functions
The examples/ directory contains demo scripts showing how to control the robot arm using Ling Follower Arm ROS2 Humble.
examples/
├── 01_demo_pick_and_place.py       # Joint and gripper control
├── 01_moveit_pick_and_place.py     # Joint and gripper control (MoveIt)
└── 02_demo_drag_teaching.py        # Drag teaching
01_demo_pick_and_place.py
Description
Pick and Place demo. Controls the robot arm by directly publishing joint commands (/joint_commands), demonstrating the complete workflow of moving from the HOME position to point A to pick up an object, transporting it to point B to place it, and returning to HOME.
- Program starts, robot arm moves to HOME, gripper opens
- Moves above point A, descends and closes gripper, then ascends
- Moves to HOME
- Moves above point B, descends and opens gripper, then ascends
- Moves to HOME, program ends
Usage
The underlying driver node must be launched first (select gripper type 50mm or 100mm as appropriate):
ros2 launch alicia_d_driver alicia_d_driver.launch.py gripper_type:=50mm
Then run this script in another terminal (assuming the workspace root directory):
python3 src/examples/01_demo_pick_and_place.py
01_moveit_pick_and_place.py
Description
Pick and Place demo. Uses MoveIt plan + execute to control the robot arm. Calls the GetMotionPlan service, allowing the planner to compute a complete trajectory with multiple intermediate waypoints. Compared to direct joint control, this provides better trajectory planning and smoother motion.
Usage
MoveIt and related nodes must be launched first (select gripper type 50mm or 100mm as appropriate):
ros2 launch alicia_d_moveit real_robot.launch.py gripper_type:=50mm
Then run this script in another terminal (assuming the workspace root directory):
python3 src/examples/01_moveit_pick_and_place.py
02_demo_drag_teaching.py
Description
Alicia-D robot arm drag teaching demo.
- After the user presses Enter, the robot arm disables torque and enters teaching mode
- The user can manually drag the robot arm while the trajectory is recorded
- The user presses Enter again, and the robot arm restores torque
- The user is asked whether to replay the trajectory; pressing Enter confirms and the robot arm moves along the recorded trajectory
Notes
- Manually support the robot arm before disabling torque to prevent it from dropping suddenly
Usage
The underlying driver node must be launched first (select gripper type 50mm or 100mm as appropriate):
ros2 launch alicia_d_driver alicia_d_driver.launch.py gripper_type:=50mm
Then run this script in another terminal (assuming the workspace root directory):
python3 src/examples/02_demo_drag_teaching.py
4.2 Hand-Eye Calibration (Extrinsic Calibration)
alicia_d_calibration is a complete hand-eye calibration solution for:
- Computing the spatial relationship between the robot arm end effector and the camera
- Outputting the calibration result transformation matrix
- Supporting various ArUco marker configurations
- Providing calibration result verification functionality
This module uses Intel Realsense D405 and Orbbec Gemini 335 cameras as examples. If using a different camera, relevant files may need to be modified.
alicia_d_calibration/
├── scripts/
│   ├── hand_eye_calibration.py             # Hand-eye calibration main script
│   ├── calibration_verifier.py             # Calibration verification script
│   └── aruco_detector.py                   # ArUco marker detector
├── launch/
│   ├── hand_eye_calibration.launch.py      # Calibration launch file
│   └── verify_calibration.launch.py        # Calibration verification launch file
├── config/
│   └── hand_eye_calibration_result.yaml    # Calibration result output file
├── package.xml
├── CMakeLists.txt
└── README.md
4.2.1 Environment Setup
Before running calibration, ensure the required environment is configured:
# Create a conda environment (if needed)
conda create -n calib python=3.10 -y
conda activate calib
conda install pip -y

# Install dependencies
pip install "numpy<2.0.0" "opencv-python<4.11" scipy pyyaml jinja2 typeguard
Unless explicitly specified, ensure you exit conda before running programs:
conda deactivate
4.2.2 Launch Required Nodes
Launch in separate terminals in sequence:
Terminal 1: Launch robot arm driver and MoveIt
Modify
gripper typeaccording to actual hardware (50/100mm)
ros2 launch alicia_d_moveit real_robot.launch.py gripper_type:=50mm
Terminal 2: Launch camera driver
For Intel Realsense D405:
ros2 launch realsense2_camera rs_launch.py \
    enable_infra1:=true \
    enable_infra2:=true \
    infra_rgb:=true \
    pointcloud.enable:=true
For Orbbec Gemini 335:
ros2 launch orbbec_camera gemini_330_series.launch.py \
    enable_left_ir:=true \
    enable_right_ir:=true \
    enable_point_cloud:=true \
    enable_colored_point_cloud:=true
4.2.3 Run Calibration
Place the ArUco marker flat on a surface 30–35 cm in front of the robot arm.
Terminal 3: Execute the calibration launch file
Activate the conda environment:
conda activate calib
Execute the calibration launch file (eye-in-hand, default for Realsense D405):
ros2 launch alicia_d_calibration hand_eye_calibration.launch.py \
calibration_type:=eye_in_hand
Eye-to-hand (default for Realsense D405):
ros2 launch alicia_d_calibration hand_eye_calibration.launch.py \
calibration_type:=eye_to_hand
If the end effector needs to be lower (calibration board is too high for eye-to-hand), adjust the Joint2/Joint3 offsets (negative values lower the end effector):
ros2 launch alicia_d_calibration hand_eye_calibration.launch.py \
    calibration_type:=eye_to_hand \
    eye_to_hand_joint2_offset:=-0.04 \
    eye_to_hand_joint3_offset:=-0.06
For Gemini 335 camera, add parameters:
ros2 launch alicia_d_calibration hand_eye_calibration.launch.py \
    camera_topic:=/camera/color/image_raw \
    camera_info_topic:=/camera/color/camera_info
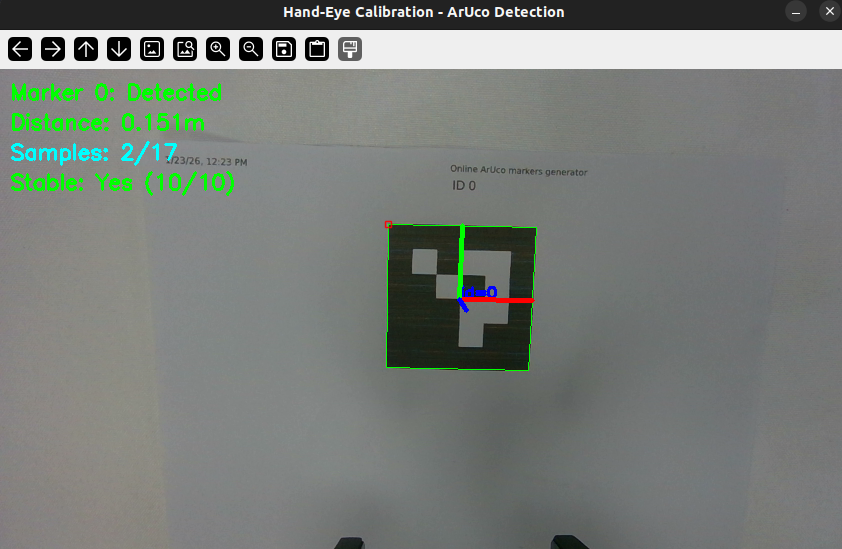
After calibration is complete, the calibration result is automatically saved to alicia_d_calibration/config/hand_eye_calibration_result.yaml.
4.2.4 Verify Calibration Results
Terminal 3: Execute the calibration verification launch file
For Realsense D405:
ros2 launch alicia_d_calibration verify_calibration.launch.py
For Gemini 335, add parameters:
ros2 launch alicia_d_calibration verify_calibration.launch.py \
    camera_topic:=/camera/color/image_raw \
    camera_info_topic:=/camera/color/camera_info
Terminal 4: Verify calibration
View TF tree:
ros2 run rqt_tf_tree rqt_tf_tree --force-discover
Verify calibration result:
ros2 run tf2_ros tf2_echo base_link aruco_marker_frame
If calibration type is eye_to_hand (marker fixed at end effector), change to:
ros2 run tf2_ros tf2_echo gripper_center aruco_marker_frame
The verification script outputs stability metrics (
std_t/std_r). If the translation standard deviation exceeds 2 cm or the rotation standard deviation exceeds 2°, the data quality is usually poor (poor lighting, occlusion, marker vibration, or insufficient samples).
Place the ArUco marker in the camera's field of view and verify the coordinate transform from base_link to aruco_marker_frame in the verification terminal. In rviz, click add to add pointcloud2 and observe the relative position of the point cloud and the robot arm.
5. 2D Grasping (Eye-on-Hand)
alicia_d_cube_sort provides a complete color recognition and automatic sorting solution for the Alicia-D robot arm. It detects cubes in the workspace using a color camera and automatically sorts them to designated positions by color.
- Move robot arm to the detection position (home)
- Wait for the detection node to send detection results
- Pick up green cubes first and place them at the designated position (drop_green)
- Then pick up blue cubes and place them at another position (drop_blue)
- Repeat until all cubes are sorted
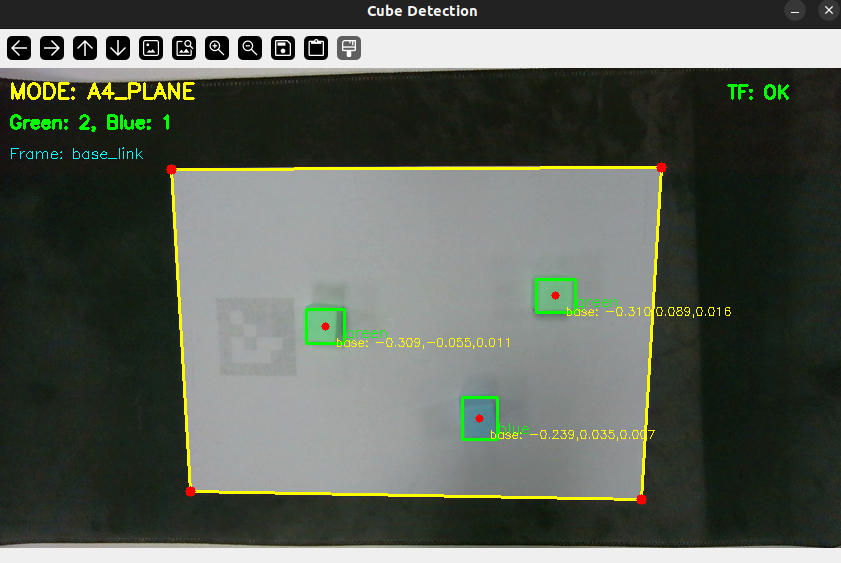
Scene Setup: Prepare a white A4 sheet of paper and place it on a surface with relatively high contrast (such as a black tablecloth). Place the cubes on the A4 paper; ensure the camera field of view covers the entire A4 sheet when the robot arm is at the detection position (home).
This module uses Intel Realsense D405 and Orbbec Gemini 335 cameras as examples. If using a different camera, relevant files may need to be modified.
alicia_d_cube_sort/
├── scripts/
│   ├── cube_detection.py              # Cube detection node
│   └── cube_sorting.py                # Sorting control node
├── launch/
│   ├── cube_detection.launch.py       # Detection launch file
│   └── cube_sorting.launch.py         # Sorting launch file
├── config/
│   └── cube_sorting.yaml              # Configuration file
├── alicia_d_cube_sort/
│   ├── __init__.py                    # Python package init
│   └── utils/                         # Utility modules
├── package.xml
├── CMakeLists.txt
└── README.md
5.1 Configuration
The config/cube_sorting.yaml file defines the parameters for this module; modify as needed.
You may need to update the predefined positions in the robot arm grasping workflow:
positions:
  # HOME position - Camera viewing position for cube detection
  home:
    joints: [0.0, 0.1089, 0.6703, 0.0, -1.4174, 0.0]
    description: "Camera viewing position for cube detection"

  # Drop zone for GREEN cubes
  drop_green:
    joints: [1.0, -0.0483, 0.8309, -0.0545, -1.4830, -1.3617]
    description: "Position above green cube drop zone"

  # Drop zone for BLUE cubes
  drop_blue:
    joints: [-1.0, 0.0882, 0.3399, 0.0468, -1.2804, -1.3249]
    description: "Position above blue cube drop zone"
Modify the following configuration to adjust detection module sensitivity to noise:
detection_confirmation:
  confirm_count: 5         # Number of consecutive frames to confirm detection
  distance_threshold: 0.01 # Max distance (m) to consider same cube across frames
  timeout: 2.0             # Timeout (s) to forget unconfirmed detections
5.2 Environment Setup
Before running the program, ensure the required environment is configured:
# Create a conda environment (if needed)
conda create -n 2d python=3.10 -y
conda activate 2d
conda install pip -y

# Install dependencies
pip install "numpy>=1.24,<2.0" scipy pyyaml opencv-python opencv-contrib-python jinja2 typeguard
Unless explicitly specified, ensure you exit conda before running programs:
conda deactivate
5.3 Run the 2D Grasping Module
5.3.1 Launch Required Nodes
Launch in separate terminals in sequence:
Terminal 1: Launch robot arm driver and MoveIt
Modify
gripper typeaccording to actual hardware (50/100mm)
ros2 launch alicia_d_moveit real_robot.launch.py gripper_type:=50mm
Terminal 2: Launch camera driver
For Realsense D405:
ros2 launch realsense2_camera rs_launch.py \
    enable_infra1:=true \
    enable_infra2:=true \
    infra_rgb:=true \
    pointcloud.enable:=true
For Gemini 335:
ros2 launch orbbec_camera gemini_330_series.launch.py \
    enable_left_ir:=true \
    enable_right_ir:=true \
    enable_point_cloud:=true \
    enable_colored_point_cloud:=true
5.3.2 Run Detection Module
Terminal 3: Launch detection node
Activate the conda environment:
conda activate 2d
Launch the detection node (default for Realsense D405):
ros2 launch alicia_d_cube_sort cube_detection.launch.py
For Gemini 335, add parameters:
ros2 launch alicia_d_cube_sort cube_detection.launch.py \
    camera_topic:=/camera/color/image_raw \
    camera_info_topic:=/camera/color/camera_info
Ensure a complete white A4 sheet is placed under the objects that can be recognized by the camera during grasping recognition (as shown by the yellow area in the figure):
5.3.3 Run Sorting Module
Terminal 4: Launch sorting node
Ensure you exit the conda environment and launch the sorting node:
ros2 launch alicia_d_cube_sort cube_sorting.launch.py
After launch, the robot arm moves to the detection position (HOME position), waits for detection results from the detection node, then picks up and sorts the cubes.
6. 6D Grasping (Eye-on-Hand)
alicia_d_6d_grasp provides complete 6D grasping functionality for the Alicia-D robot arm. It combines a depth camera and grasping algorithm (GraspGen) to enable grasping of objects in arbitrary poses.
This module currently only supports Intel Realsense D405 (recommended) and Orbbec Gemini 335 cameras.
In this code, the D405 supports colored point clouds. The Gemini 335 does not currently support colored point clouds, but this does not affect grasping performance.
To use a different camera, relevant code must be modified accordingly.
6.1 Source Installation and Environment Setup
This section is reproduced and adapted from the official documentation [GraspGen] [FoundationStereo] [SAM2], which may be behind the official documentation. It is strongly recommended to cross-reference with the official documentation.
If you encounter problems, AI assistance is available.
6.1.1 GraspGen Installation
# Environment setup
conda create -n GraspGen python=3.10 -y && conda activate GraspGen
pip install torch==2.1.0 torchvision==0.16.0 torch-cluster torch-scatter -f https://data.pyg.org/whl/torch-2.1.0+cu121.html
cd ~/alicia_ws/src/alicia_d_grasp_6d/Models
# Clone repository and install
git clone https://github.com/NVlabs/GraspGen.git
cd GraspGen && pip install -e .
# Install CUDA
conda install -c "nvidia/label/cuda-12.1.0" cuda-toolkit
# Install PointNet dependencies
./install_pointnet.sh
Download checkpoints:
cd ~/alicia_ws/src/alicia_d_grasp_6d/Models/GraspGen
git clone https://huggingface.co/adithyamurali/GraspGenModels
sudo apt update
sudo apt install git-lfs
git lfs install
cd GraspGenModels
git lfs pull
If you have not installed the NVIDIA graphics driver:
sudo apt update
sudo apt install nvidia-driver-535
# A system restart is required after installation for changes to take effect
Install and launch meshcat-server:
conda activate GraspGen
pip install meshcat
meshcat-server
Open a new terminal and run inference:
conda activate GraspGen
cd ~/alicia_ws/src/alicia_d_grasp_6d/Models/GraspGen
python scripts/demo_object_pc.py --sample_data_dir GraspGenModels/sample_data/real_object_pc --gripper_config GraspGenModels/checkpoints/graspgen_robotiq_2f_140.yml
Open the output link in a browser. When meshcat-server successfully generates the object point cloud and grasp poses, the module environment is configured successfully.
6.1.2 FoundationStereo Installation
[FoundationStereo Official Documentation]
cd ~/alicia_ws/src/alicia_d_grasp_6d/Models
git clone https://github.com/NVlabs/FoundationStereo.git
Environment setup:
cd FoundationStereo
conda env create -f environment.yml
conda activate foundation_stereo
conda install -c "nvidia/label/cuda-12.1.0" cuda-toolkit
pip install flash-attn --no-build-isolation
Download the official weights and save them to the FoundationStereo/pretrained_models/ folder.
Run inference:
cd ~/alicia_ws/src/alicia_d_grasp_6d/Models/FoundationStereo
python scripts/run_demo.py --left_file ./assets/left.png --right_file ./assets/right.png --ckpt_dir ./pretrained_models/11-33-40/model_best_bp2.pth --out_dir ./test_outputs/
If a point cloud visualization pops up, the module environment is configured successfully.
6.1.3 SAM2 Installation
In the alicia_d_grasp_6d/Models/ directory:
cd ~/alicia_ws/src/alicia_d_grasp_6d/Models
conda create -n sam2 python=3.10 && conda activate sam2
git clone https://github.com/facebookresearch/sam2.git && cd sam2
pip install -e .
pip install -e ".[notebooks]"
Open sam2/checkpoints/download_ckpts.sh, uncomment the SAM 2 checkpoints section, and comment out the SAM 2.1 checkpoints section:
#!/bin/bash

# Copyright (c) Meta Platforms, Inc. and affiliates.
# All rights reserved.

# This source code is licensed under the license found in the
# LICENSE file in the root directory of this source tree.

# Use either wget or curl to download the checkpoints
if command -v wget &> /dev/null; then
    CMD="wget"
elif command -v curl &> /dev/null; then
    CMD="curl -L -O"
else
    echo "Please install wget or curl to download the checkpoints."
    exit 1
fi

# Define the URLs for SAM 2 checkpoints
SAM2_BASE_URL="https://dl.fbaipublicfiles.com/segment_anything_2/072824"
sam2_hiera_t_url="${SAM2_BASE_URL}/sam2_hiera_tiny.pt"
sam2_hiera_s_url="${SAM2_BASE_URL}/sam2_hiera_small.pt"
sam2_hiera_b_plus_url="${SAM2_BASE_URL}/sam2_hiera_base_plus.pt"
sam2_hiera_l_url="${SAM2_BASE_URL}/sam2_hiera_large.pt"

# Download each of the four checkpoints using wget
echo "Downloading sam2_hiera_tiny.pt checkpoint..."
$CMD $sam2_hiera_t_url || { echo "Failed to download checkpoint from $sam2_hiera_t_url"; exit 1; }

echo "Downloading sam2_hiera_small.pt checkpoint..."
$CMD $sam2_hiera_s_url || { echo "Failed to download checkpoint from $sam2_hiera_s_url"; exit 1; }

echo "Downloading sam2_hiera_base_plus.pt checkpoint..."
$CMD $sam2_hiera_b_plus_url || { echo "Failed to download checkpoint from $sam2_hiera_b_plus_url"; exit 1; }

echo "Downloading sam2_hiera_large.pt checkpoint..."
$CMD $sam2_hiera_l_url || { echo "Failed to download checkpoint from $sam2_hiera_l_url"; exit 1; }

# Define the URLs for SAM 2.1 checkpoints
# SAM2p1_BASE_URL="https://dl.fbaipublicfiles.com/segment_anything_2/092824"
# sam2p1_hiera_t_url="${SAM2p1_BASE_URL}/sam2.1_hiera_tiny.pt"
# sam2p1_hiera_s_url="${SAM2p1_BASE_URL}/sam2.1_hiera_small.pt"
# sam2p1_hiera_b_plus_url="${SAM2p1_BASE_URL}/sam2.1_hiera_base_plus.pt"
# sam2p1_hiera_l_url="${SAM2p1_BASE_URL}/sam2.1_hiera_large.pt"

# SAM 2.1 checkpoints
# echo "Downloading sam2.1_hiera_tiny.pt checkpoint..."
# $CMD $sam2p1_hiera_t_url || { echo "Failed to download checkpoint from $sam2p1_hiera_t_url"; exit 1; }

# echo "Downloading sam2.1_hiera_small.pt checkpoint..."
# $CMD $sam2p1_hiera_s_url || { echo "Failed to download checkpoint from $sam2p1_hiera_s_url"; exit 1; }

# echo "Downloading sam2.1_hiera_base_plus.pt checkpoint..."
# $CMD $sam2p1_hiera_b_plus_url || { echo "Failed to download checkpoint from $sam2p1_hiera_b_plus_url"; exit 1; }

# echo "Downloading sam2.1_hiera_large.pt checkpoint..."
# $CMD $sam2p1_hiera_l_url || { echo "Failed to download checkpoint from $sam2p1_hiera_l_url"; exit 1; }

echo "All checkpoints are downloaded successfully."
Download official weights:
cd checkpoints && \
./download_ckpts.sh && \
cd ..
6.2 Run the 6D Grasping Module
- Launch the robot arm and camera;
- Launch the ROS bridge node and MeshCat visualization server;
- Launch the grasp execution node and wait for the robot arm to move to the observation position;
- Launch the depth estimation node (FoundationStereo) and the target segmentation node (SAM2). No order required; they can be launched simultaneously;
- After selecting the target object in the SAM2 image window, launch the grasp pose generation node (GraspGen);
- Choose whether to execute the grasp in the terminal interaction; the current grasp pose will be highlighted in red in meshcat;
- The robot arm executes the grasping action and returns to the observation position when complete;
- (Optional) Select a new object in the SAM2 image window, then press
Enterin the GraspGen node terminal to generate new grasp poses based on the new point cloud and mask. Repeat steps 6–8 until the task is complete.
6.2.1 Launch Robot Arm and Camera
Launch robot arm driver and MoveIt (modify gripper type as appropriate):
ros2 launch alicia_d_moveit real_robot.launch.py gripper_type:=50mm
For Realsense D405 (recommended):
ros2 launch realsense2_camera rs_launch.py \
    enable_infra1:=true \
    enable_infra2:=true \
    infra_rgb:=true \
    pointcloud.enable:=true
For Gemini 335:
ros2 launch orbbec_camera gemini_330_series.launch.py \
    enable_left_ir:=true \
    enable_right_ir:=true \
    enable_point_cloud:=true \
    enable_colored_point_cloud:=true
The following instructions use Intel Realsense D405 as an example. If using Orbbec Gemini 335, modify file paths and file names accordingly.
6.2.2 Launch ROS Bridge Node
# System Python environment
python3 d405_ros_bridge.py
6.2.3 Launch MeshCat Visualization Server
# GraspGen environment
conda activate GraspGen
meshcat-server
Open the output link in a browser.
6.2.4 Launch Grasp Execution Node
# System Python environment (exit conda)
python3 d405_execution.py
This node listens for grasp pose topics and calls MoveIt to execute the grasping action.
After launching this node, the robot arm opens the gripper and moves to the preset observation position, waiting for grasp poses. When the GraspGen node generates a grasp pose, the current grasp pose is highlighted in red in MeshCat, and the terminal prompts the user whether to execute the current grasp.
Interaction:
y: Execute the current graspn: Skip, view the next oneq: Quit
Among the candidate grasp poses, those with the following characteristics are processed with higher priority:
- Grasp direction close to vertically downward
- Higher confidence (score evaluated by GraspGen)
- Shorter joint path distance (calculated based on current robot arm pose)
Therefore, grasp poses listed first typically have higher quality and IK solve success rates. If many of the top poses fail IK solving, try adjusting the grasp-related parameters in d405_execution.py:
GRIPPER_DEPTH: Gripper depthPRE_GRASP_DISTANCE: Pre-grasp distancemin_z: Minimum z-axis value for grasp poses; poses below this value are filtered out in advance
Wait for the robot arm to move to the observation position before launching subsequent nodes.
6.2.5 Launch Depth Estimation Node (FoundationStereo)
# foundation_stereo environment
conda activate foundation_stereo
python d405_foundationstereo.py --visualize
Parameters:
--visualize: Display depth map (displayed only after the first inference; press q to exit)--ckpt_dir: Model weights path--scale: Image scaling ratio--z_far: Maximum depth--denoise_cloud: Enable point cloud denoising (enabled by default)
q to exit the image view before the point cloud topic is published.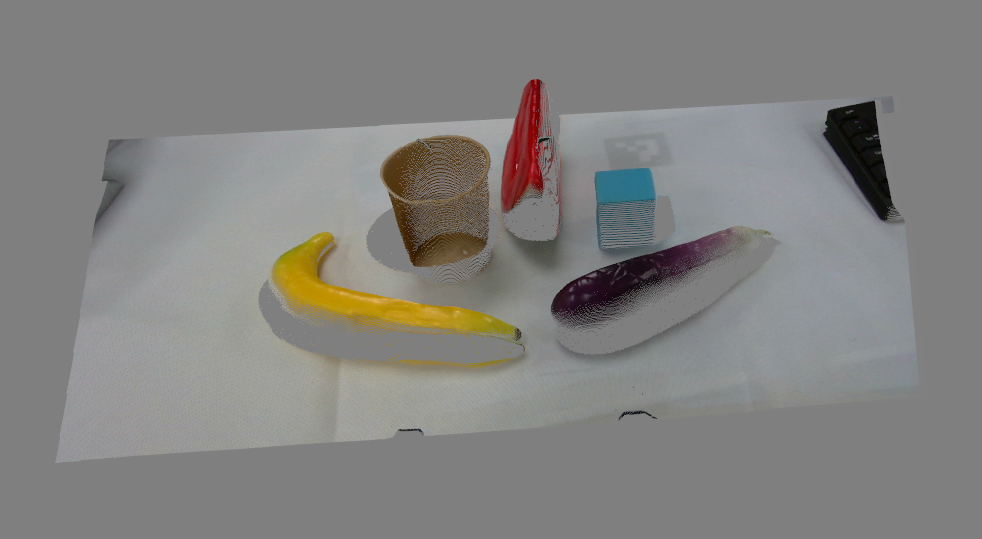
6.2.6 Launch Target Segmentation Node (SAM2)
# SAM2 environment
conda activate sam2
python d405_sam2.py
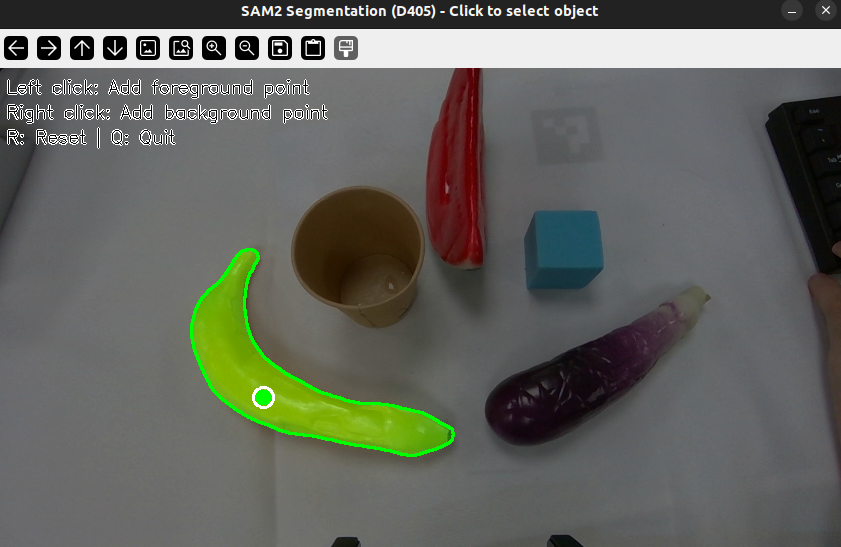
After launching this node, a window will pop up displaying the color image in real time. The user can click on the image to add positive sample points (target area) and negative sample points (background area) to guide the SAM2 model in generating the target object mask.
Parameters:
--model: Model size [tiny/small/base/large] (default: large)--bridge_port: ZeroMQ port
Interaction:
- Left-click: Add positive sample point (target area)
- Right-click: Add negative sample point (background area)
rkey: Resetq: Quit
6.2.7 Launch Grasp Pose Generation Node (GraspGen)
# GraspGen environment
conda activate GraspGen
python d405_graspgen.py
This node subscribes to point cloud and mask topics, uses the GraspGen model to generate grasp poses, and publishes them to the grasp execution node. You can view the generated grasp poses in the meshcat-server interface; the current grasp pose is highlighted in red. You can choose whether to execute the current grasp in the terminal running the grasp execution node.
After the robot arm completes a grasp and returns to the observation position, select a new target object in the SAM2 window and press Enter in the GraspGen terminal. GraspGen will then generate new grasp poses based on the new point cloud and mask.
Parameters:
--gripper_config: Gripper configuration file--grasp_threshold: Confidence threshold (default: 0.8)--num_grasps: Number of grasps to generate (default: 200)--topk_num_grasps: Return top-k grasps (default: 100)
In meshcat-server, the object point cloud is in the robot arm base coordinate frame and has been centered.