Alicia-D Follower Arm Python SDK
1. Introduction
The Alicia-D SDK is a Python development toolkit for controlling the Alicia-D series six-axis robotic arm (with gripper). The SDK is built on Synria's in-house RoboCore robotics core library and supports precise motion control of the robotic arm, gripper operation, and real-time reading of key data such as the arm's pose and operating status via serial communication.
1.1 Main Features
- Joint control: Supports setting and reading the angles of the six joints, with smooth interpolated execution.
- End-effector trajectory: Supports Cartesian-space end-effector pose trajectory planning.
- Gripper control: Supports precise angle control or one-click open/close.
- Torque control: Turn the joint motor torque on or off, enabling free dragging (teaching).
- Zero-point setting: Set the current position as the new zero point.
- State reading: Get joint angles, gripper angle, and end-effector pose in real time.
- Automatic serial connection: Automatically searches for the serial port or manually specifies it.
- Teaching mode: Drag to record pose points and execute trajectories.
- Logging system: Supports log-level filtering and can control the verbosity of console output.
2. Installation and Configuration
2.1 Environment Requirements
- Python 3.11 or above
- A computer with serial-port support (the USB-to-serial chip is integrated into the robotic arm)
2.2 Installation Steps
Get the code and the corresponding examples routines:
git clone https://github.com/Synria-Robotics/Alicia-D-SDK.git
cd Alicia-D-SDK

# 2. Create a Python environment (Conda recommended)
conda create -n alicia python=3.11
conda activate alicia
Method 1: Install from Source (Development Mode)
If you need to modify the source code or participate in development:
cd Alicia-D-SDK
pip install -e .
Method 2: Install from PyPI
pip install alicia_d_sdk
2.3 Quick Start
Basic usage example:
from alicia_d_sdk import create_robot

# Create a robot instance (automatically searches for the serial port and connects; auto_connect=True is the default)
robot = create_robot()

# Check the connection status
if robot.is_connected():
    print("Connected successfully!")

    # Print the current state
    robot.print_state()

    # Move to the home position
    robot.set_home()

    # Disconnect
    robot.disconnect()
else:
    print("Connection failed; please check the serial port")
Note: create_robot() connects automatically by default (auto_connect=True). If you do not want automatic connection, you can set auto_connect=False:
# Manually control the connection
robot = create_robot(auto_connect=False)
if robot.connect():
    # Use the robot
    robot.print_state()
    robot.set_home()
    robot.disconnect()
Manually specify the serial port:
# Linux
robot = create_robot(port="/dev/ttyACM0")

# Windows
robot = create_robot(port="COM3")
2.4 Setting Serial-Port Permissions
On Linux systems, you need to configure access permissions for the USB serial device (Windows and macOS users can skip this step).
# Method 1: Add the user to the dialout group (recommended, permanent)
sudo usermod -a -G dialout $USER
# Note: You need to log out and log back in for the group permissions to take effect

# Method 2: Temporarily set serial-port permissions
sudo chmod 666 /dev/ttyACM*

# Method 3: Create a udev rule (permanent)
echo 'KERNEL=="ttyUSB*", MODE="0666"' | sudo tee /etc/udev/rules.d/99-serial.rules
sudo udevadm control --reload-rules
sudo udevadm trigger
2.5 Hardware Connection and Verification
-
Connect the robotic arm to the computer via USB.
-
Check whether the serial port is recognized by the system (different platforms may sometimes recognize the device as
COM*orttyACM*):Linux:
ls -l /dev/ttyACM*macOS:
ls /dev/cu.*Windows:
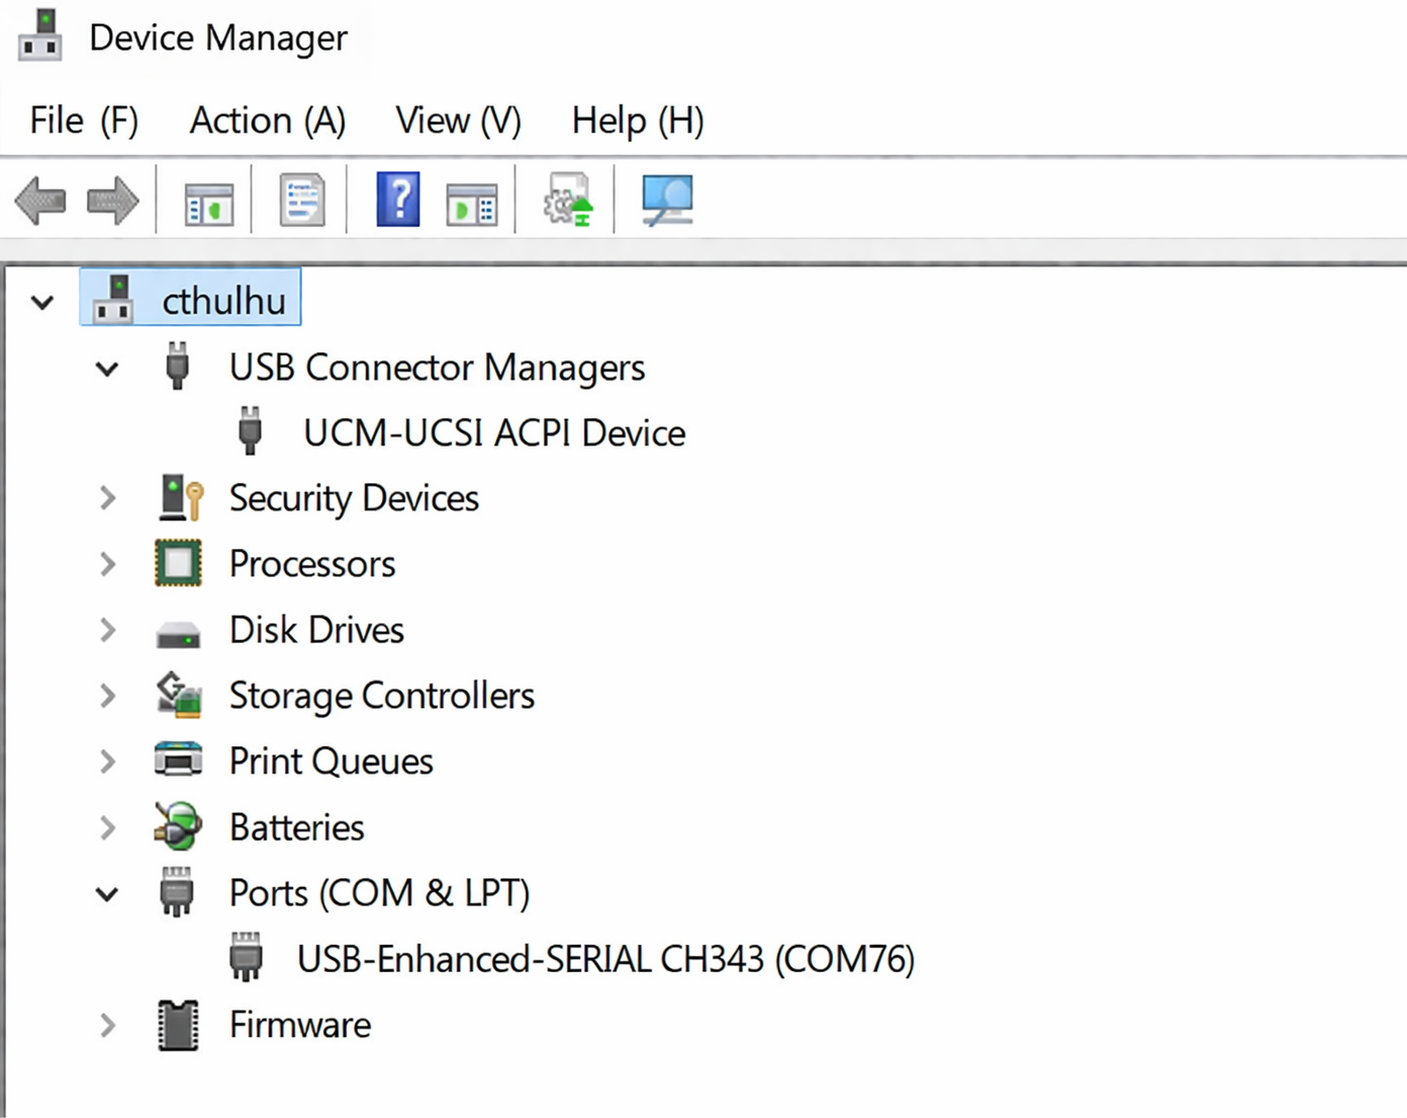
- Run the version-reading example to verify the connection:
If the connection is successful, the terminal will display information such as the robotic arm's firmware version.
cd examples
python3 00_demo_read_version.py
2.6 Troubleshooting
- Check the hardware: Ensure the USB cable is firmly connected and the robotic arm is powered on.
- Check permissions: Confirm your user has permission to access the serial device.
- Manually specify the port: If the SDK cannot automatically find the port, you can specify it manually when starting the program:
python3 00_demo_read_version.py --port /dev/ttyACM0
Serial port not found / connection failed
- Check the USB cable and power
- Linux users need to ensure they are in the
dialoutuser group:sudo usermod -a -G dialout $USER
# Then log back in - Run
00_demo_read_version.pyto detect the firmware version
Permission denied
- Try running with sudo or check the user's serial-port permissions
- Linux: Ensure the user is in the dialout group
- Check whether the serial port is occupied by another program
Firmware version detection failed
- Run
00_demo_read_version.pymultiple times - Check whether the serial connection is stable
2.7 Dependency Package Notes
Main dependencies:
pyserial: serial communicationnumpy: numerical computationpycrc: CRC checksumrobocore: kinematics and trajectory planning (installed automatically)
3. Example File Descriptions
The examples/ directory contains several demonstration scripts that show how to use the Alicia-D SDK to control the robotic arm. All scripts support the --port and --baudrate parameters.
3.1 File Structure
examples/
├── 00_demo_read_version.py          # Read the version number
├── 01_torque_switch.py               # Torque control
├── 02_demo_zero_calibration.py      # Zero calibration
├── 03_demo_read_state.py            # Read state
├── 04_demo_move_gripper.py          # Gripper control
├── 05_demo_move_joint.py            # Joint-space motion
├── 06_demo_forward_kinematics.py    # Forward kinematics
├── 07_demo_inverse_kinematics.py    # Inverse kinematics
├── 08_demo_drag_teaching.py         # Drag teaching
├── 09_demo_joint_traj.py            # Joint-space trajectory planning
├── 10_demo_cartesian_traj.py        # Cartesian-space trajectory planning
├── 11_benchmark_read_joints.py      # Joint-reading performance benchmark
└── 12_utmostFPS.py                  # Maximum frame-rate test
3.2 Main Parameter Descriptions
Most example scripts share a common set of command-line parameters for easy configuration and debugging.
| Parameter | Data Type | Default | Description |
|---|---|---|---|
--port | str | "" | Specifies the serial port to which the robotic arm is connected, e.g., /dev/ttyACM0. Leave empty for automatic search. |
--gripper_type | str | 50mm | Gripper model. |
Some example scripts also include parameters for specific features:
--format: Angle display format, eitherrad(radians) ordeg(degrees), defaultdeg--single: Print the state once (only applicable to state-reading scripts)--mode: Drag-teaching mode, eithermanual,auto, orreplay_only--save-motion: Motion name (used for the drag-teaching feature)--list-motions: List all available motions (drag-teaching feature)--speed_deg_s: Joint motion speed (degrees/second), default 10, range 5-400--execute: Execute the move to the target position (inverse-kinematics example)
3.3 Basic Functions
00_demo_read_version.py
Read the robotic arm's firmware version number
- Run this script to detect the firmware version
Usage:
python 00_demo_read_version.py
01_torque_switch.py
Toggle the torque state of all joints of the robotic arm (power on/off)
Parameter description:
--port: Serial port (optional)
Function description:
- First turns off the torque, then turns it on
- After torque is turned off, the robotic arm can be dragged manually
- After teaching is complete, re-enable the torque
Notes:
- Before turning off the torque, manually support the robotic arm to prevent it from suddenly dropping
- After teaching is complete, be sure to re-enable the torque
Usage:
python 01_torque_switch.py
02_demo_zero_calibration.py
Set the robotic arm's current position as the new zero point
This operation is irreversible; please use it with caution.
Parameter description:
--port: Serial port (optional)
Applicable scenarios:
- When the robotic arm is used for the first time or after a long period of disuse
- When joint angles show deviation
- When the zero-point reference needs to be re-established
Usage:
python 02_demo_zero_calibration.py
03_demo_read_state.py
Continuously read and print the robotic arm's joint angles, end-effector pose, and gripper state
Supports single or continuous printing modes.
Parameter description:
--port: Serial port (optional)--robot_version: Robot version, defaultv5_6--gripper_type: Gripper model, default50mm--format: Angle display format, eitherrad(radians) ordeg(degrees), defaultdeg--single: Print the state once; continuous printing by default
Use cases:
- Debugging and troubleshooting
- Real-time monitoring of the robotic arm's state
- Verifying the execution results of control commands
Usage:
# Continuously print the state (press Ctrl+C to stop)
python 03_demo_read_state.py --gripper_type 50mm

# Print the state once
python 03_demo_read_state.py --single
3.4 Motion Control
04_demo_move_gripper.py
Gripper control: control the gripper to open or close to a specified angle
The gripper value range is 0-1000 (0 is fully closed, 1000 is fully open).
Parameter description:
--port: Serial port (optional)
Function description:
- Demonstrates automatic execution: fully open → fully closed → half open
- Uses
set_robot_state(gripper_value=...)to control the gripper - Supports waiting for the gripper motion to complete
Usage:
python 04_demo_move_gripper.py
05_demo_move_joint.py
Use joint-space motion to move the robotic arm to the set angles
Supports both degree and radian input, with automatic joint-angle interpolation.
Parameter description:
--port: Serial port (optional)--speed_deg_s: Joint motion speed (degrees/second), default 10, range 5-400
Function description:
- Demonstrates automatic execution: return to zero → move to target angles → return to zero
- Uses the unified joint and gripper target interface
set_robot_state() - Supports
wait_for_completion=Trueto wait for the motion to complete
Usage:
python 05_demo_move_joint.py --speed_deg_s 10
3.5 Kinematics Solving
06_demo_forward_kinematics.py
Forward kinematics solving
Calculates the end-effector's pose based on the current joint angles, displaying multiple representations such as position, rotation matrix, Euler angles, and quaternion.
Parameter description:
--port: Serial port (optional)
Function description:
- Uses the RoboCore library's robot model
- Displays the robot model information and the kinematic chain
- Returns and displays: position, rotation matrix, Euler angles (radians/degrees), quaternion, homogeneous transformation matrix
- Note: A quaternion q and -q represent the same rotation
Usage:
python 06_demo_forward_kinematics.py
07_demo_inverse_kinematics.py
Demonstrates inverse-kinematics solving
Given a target end-effector pose, computes and optionally executes the joint angles. Supports multiple IK solving methods and multi-start optimization.
Parameter description:
--port: Serial port (optional)--speed_deg_s: Joint motion speed (degrees/second), default 10, range 5-400--gripper_type: Gripper type, default50mm--base_link: Base link name, defaultbase_link--end_link: End-effector link name, defaulttool0--end-pose: Target pose (7 floats: px py pz qx qy qz qw); a default value is preset--method: IK method, eitherdls(damped least squares),pinv(pseudo-inverse), ortranspose(Jacobian transpose), defaultdls--max-iters: Maximum number of iterations, default 500--pos-tol: Position tolerance (meters), default 1e-3--ori-tol: Orientation tolerance (radians), default 1e-3--num-inits: Number of initial guesses, default 10--init-strategy: Initial-guess strategy, one ofzero,random,sobol,latin,center,uniform,current(default:current, uses the current joint angles)--init-scale: Joint-limit scaling factor (0.0 to 1.0), default 1.0--seed: Random seed, default None--backend: Computation backend, eithernumpyortorch, defaultnumpy--execute: Execute the move to the solved position--force-execute: Force execution of the move to the solved position, regardless of success
Function description:
- Displays detailed solving results (success/failure, number of iterations, position error, orientation error)
- If a move is executed, it automatically returns to the initial position
- Supports multi-start optimization to improve the success rate
Usage:
# Compute the inverse solution only, without executing the motion
python 07_demo_inverse_kinematics.py

# Compute the inverse solution and control the robotic arm to move to the target pose
python 07_demo_inverse_kinematics.py --execute --speed_deg_s 10

# Use multi-start optimization to improve the success rate
python 07_demo_inverse_kinematics.py --execute --num-inits 10

# Use the torch backend to accelerate computation
python 07_demo_inverse_kinematics.py --backend torch --execute
3.6 Advanced Applications
08_demo_drag_teaching.py
Drag-teaching demonstration
Records a series of trajectory points by manually dragging the robotic arm, and can replay them. Supports three modes: manual interpolation, automatic fast, and replay-only.
Parameter description:
--port: Serial port (optional)--speed_deg_s: Joint motion speed (degrees/second), default 10--mode: Drag-teaching mode, eithermanual(manual interpolation),auto(automatic fast), orreplay_only(replay only), defaultauto--sample-hz: Sampling frequency for automatic mode, default 300.0 Hz--save-motion: Motion name (recording mode: new motion name; replay mode: existing motion name)--list-motions: List all available motions and exit
Function description:
- Turns off the torque to enter teaching mode
- Manually drag the robotic arm to record the trajectory
- Supports manual mode (record key points) and automatic mode (continuous sampling)
- Replay the recorded trajectory
Usage:
# List all available motions
python 08_demo_drag_teaching.py --list-motions

# Record a trajectory named "my_demo" in automatic mode
python 08_demo_drag_teaching.py --mode auto --save-motion my_demo

# Record a key-point trajectory in manual mode
python 08_demo_drag_teaching.py --mode manual --save-motion key_points

# Replay an existing trajectory "my_demo"
python 08_demo_drag_teaching.py --mode replay_only --save-motion my_demo
09_demo_joint_traj.py
Joint-space trajectory planning and execution
Demonstrates how to use joint-space trajectory planning to generate smooth joint trajectories and execute them through multiple waypoints.
Parameter description:
--port: Serial port (optional)--gripper_type: Gripper type, default50mm--base_link: Base link name, defaultbase_link--end_link: End-effector link name, defaulttool0--backend: Computation backend, eithernumpyortorch, defaultnumpy--device: Device for the torch backend, eithercpuorcuda, defaultcpu--no-record: Disable recording mode--save-file: File path to save the recorded waypoints--waypoints-file: Load waypoints from a JSON file--num-waypoints: Number of randomly generated waypoints, default 6--joint-scale: Random joint scaling factor (0.0-1.0), default 0.6--use-current-joints: Use the current joints as the first waypoint--planner: Planner type, eitherb_splineormulti_segment, defaultb_spline--duration: Trajectory duration (B-Spline), default 2.0 seconds--duration-per-segment: Duration per segment (Multi-Segment), default 1.0 seconds--num-points: Number of trajectory points (B-Spline), default 800--num-points-per-segment: Number of points per segment (Multi-Segment), default 100--bspline-degree: B-Spline degree, either 3 or 5, default 5--segment-method: Multi-segment method, eithercubicorquintic, defaultquintic--speed-deg-s: Joint motion speed (degrees/second), default 30--timeout: Timeout per command (seconds), default 10.0--seed: Random seed, default 666--no-plot: Disable trajectory visualization (enabled by default)
Function description:
- Supports manually recording waypoints or loading them from a file
- Uses the B-Spline or Multi-Segment planner to generate smooth trajectories
- Supports gripper trajectory interpolation
- Visualizes the trajectory (optional)
Usage:
# Run with default parameters
python 09_demo_joint_traj.py

# Load waypoints from a file
python 09_demo_joint_traj.py --waypoints-file waypoints.json

# Use the Multi-Segment planner
python 09_demo_joint_traj.py --planner multi_segment
10_demo_cartesian_traj.py
Cartesian-space trajectory planning and execution
Demonstrates how to use Cartesian-space spline trajectory planning to generate smooth end-effector trajectories and execute them via inverse-kinematics solving.
Parameter description:
--port: Serial port (optional)--gripper_type: Gripper type, default50mm--base_link: Base link name, defaultbase_link--end_link: End-effector link name, defaulttool0--backend: Computation backend, eithernumpyortorch, defaultnumpy--device: Device for the torch backend, eithercpuorcuda, defaultcpu--no-record: Disable recording mode--save-file: File path to save the recorded waypoints--waypoints-file: Load waypoints from a JSON file (4x4 matrices or dicts containing position/orientation)--num-waypoints: Number of randomly generated waypoints, default 2--workspace-scale: Workspace scaling factor (0.0-1.0), default 0.6--duration: Trajectory duration (seconds), default 1.0--num-points: Number of trajectory points, default 10--method: IK method, eitherdls,pinv, ortranspose, defaultdls--max-iters: Maximum number of IK iterations, default 100--pos-tol: Position tolerance (meters), default 1e-2--ori-tol: Orientation tolerance (radians), default 1e-2--num-inits: Number of initial guesses, default 5--init-strategy: Initial-guess strategy, one ofzero,random,sobol,latin,center,uniform,current, defaultcurrent--init-scale: Initial-guess scaling factor (0.0-1.0), default 0.6--seed: Random seed, default 666--speed-deg-s: Joint motion speed (degrees/second), default 30--timeout: Timeout per command (seconds), default 10.0--no-plot: Disable trajectory visualization (enabled by default)
Function description:
- Supports manually recording Cartesian waypoints or loading them from a file
- Uses spline curves to generate smooth Cartesian trajectories
- Batch-solves inverse kinematics (ensuring continuity)
- Verifies that the waypoints are accurately passed through
- Visualizes the trajectory and IK results (optional)
Usage:
# Run with default parameters
python 10_demo_cartesian_traj.py

# Load waypoints from a file
python 10_demo_cartesian_traj.py --waypoints-file cartesian_waypoints.json

# Increase the number of trajectory points to improve smoothness
python 10_demo_cartesian_traj.py --num-points 100
11_benchmark_read_joints.py
Joint-reading performance benchmark
Tests the API call frequency and the actual data update frequency of joint-angle reading.
Parameter description:
--port: Serial port (optional)--gripper_type: Gripper type, default50mm--duration: Test duration (seconds), default 5.0--fast: Enable fast mode (set the update interval to 1ms)
Function description:
- Tests the API read frequency (the speed of reading cached data from Python memory)
- Tests the data update frequency (the rate of receiving new data from the actual robot)
- Displays serial-port statistics (number of frames processed, number of frames dropped, etc.)
Usage:
python 11_benchmark_read_joints.py

python 11_benchmark_read_joints.py --duration 10
12_utmostFPS.py
Maximum frame-rate test
Tests the maximum send and receive frame rate of serial communication.
Function description:
- Tests the limit performance of serial communication
- Displays the send frame rate, receive frame rate, and sync rate
- Suitable for performance optimization and hardware testing
Note: This script contains a hard-coded serial path that needs to be modified according to the actual environment.
3.7 Common Parameter Adjustment Scenarios
Motion Control Parameter Adjustment:
New firmware (6.1.0 and above)
- Speed too fast: Lower
speed_deg_s(range: 5-400 degrees/second) - Motion not smooth: Increase
num_points(number of trajectory interpolation points) - Movement takes too long: Reduce
duration(trajectory duration) orduration_per_segment(duration per segment)
IK Solving Parameter Adjustment:
- Solving failure: Try different
method(dls,pinv,transpose) and increasenum_initial_guesses(5-10 recommended) - Local optimum: Use
initial_guess_strategy='random'or increasenum_initial_guesses - High accuracy required: Lower
pos_tol/ori_tolto 1e-5 or smaller, and increasemax_iters - High speed required: Use
method='pinv'ormethod='transpose'
Drag-Teaching Parameter Adjustment:
- Sampling frequency: Adjust
--sample-hz(default 300.0 Hz); a higher frequency records more detail but produces larger files - Mode selection:
manualmode is suitable for recording key points,automode is suitable for continuous trajectories
4. API Reference
This section introduces the core classes and method interfaces of the Alicia-D SDK.
4.1 Initialization Interface: create_robot
from alicia_d_sdk import create_robot

robot = create_robot(
    port="",                    # Serial port (leave empty for automatic search)
    gripper_type=None,          # Gripper type ("50mm" or "100mm"); when None, read from the cache file or default to "50mm"
    debug_mode=False,           # Debug mode
    auto_connect=True,          # Auto connect
    base_link="base_link",      # Base link name
    end_link="tool0",           # End-effector link name
    backend=None,               # Computation backend, 'numpy' or 'torch' (default: None, uses 'numpy')
    device="cpu"                # Device for the torch backend, 'cpu' or 'cuda' (default: 'cpu')
)
4.2 Control Interface: SynriaRobotAPI
from alicia_d_sdk import create_robot

robot = create_robot()
Connection Management:
-
connect()
Connect the robotic arm and detect the firmware version -
disconnect()
Disconnect the robotic arm and stop the update thread -
is_connected()
Check whether the robotic arm is connected
Motion Control:
-
set_home(speed_deg_s=10, gripper_speed_deg_s=483.4)
Move the robotic arm to the home positionParameters:
speed_deg_s: Joint motion speed (degrees/second); can be an int/float (same for all joints) or a list/array (different speed per joint), default 10gripper_speed_deg_s: Gripper motion speed (degrees/second); if None, uses the default 5500 ticks/s (≈483.4 deg/s), default 483.4
-
set_robot_state(target_joints=None, gripper_value=None, joint_format='rad', speed_deg_s=10, gripper_speed_deg_s=483.4, tolerance=0.1, timeout=10.0, wait_for_completion=True)
Unified joint and gripper target-setting interface; supports setting joint angles and gripper position simultaneouslyParameters:
target_joints: Optional list of target joint angles (radians or degrees). If None, keeps the current anglesgripper_value: Optional gripper value (0-1000, 0 is fully closed, 1000 is fully open). If None, keeps the current valuejoint_format: Joint-angle unit format, 'rad' (radians) or 'deg' (degrees), default 'rad'speed_deg_s: Joint motion speed (degrees/second); can be an int/float (same for all joints) or a list/array (different speed per joint, range 4.39-439.45 deg/s), default 10gripper_speed_deg_s: Gripper motion speed (degrees/second); if None, uses the default 5500 ticks/s (≈483.4 deg/s), default 483.4tolerance: Joint target tolerance (radians), default 0.1timeout: Maximum wait time (seconds), default 10.0wait_for_completion: If True, waits until the target position is reached, default True
Return value: Returns True on success, False on failure
-
set_pose(target_pose, backend=None, method='dls', pos_tol=1e-3, ori_tol=1e-3, max_iters=500, num_initial_guesses=10, initial_guess_strategy='current', initial_guess_scale=1.0, random_seed=None, speed_deg_s=10, gripper_speed_deg_s=483.4, execute=True, force_execute=False)
Use inverse kinematics to move the end-effector to the target poseParameters:
target_pose: Target pose, in the format [x, y, z, qx, qy, qz, qw] (position + quaternion)backend: Computation backend, 'numpy' or 'torch' (default: None, uses the backend set at initialization)method: IK solving method, 'dls' (damped least squares), 'pinv' (pseudo-inverse), or 'transpose', default 'dls'pos_tol: Position tolerance (meters), default 1e-3ori_tol: Orientation tolerance (radians), default 1e-3max_iters: Maximum number of iterations, default 500num_initial_guesses: Number of multi-start attempts, default 10initial_guess_strategy: Initial-guess strategy, one of 'zero', 'random', 'sobol', 'latin', 'center', 'uniform', 'current' (uses the current joint angles), default 'current'initial_guess_scale: Initial-guess scaling factor (0.0 to 1.0), default 1.0random_seed: Random seed, for reproducibility, default Nonespeed_deg_s: Joint motion speed (degrees/second); can be an int/float (same for all joints) or a list/array (different speed per joint), default 10gripper_speed_deg_s: Gripper motion speed (degrees/second); if None, uses the default 5500 ticks/s (≈483.4 deg/s), default 483.4execute: If True and IK succeeds, execute the motion, default Trueforce_execute: If True, force execution even if IK fails (requires q to be available), default False
Return value: A dictionary containing success, q, iters, pos_err, ori_err, message, motion_executed, computation_time
Trajectory Planning:
-
plan_joint_trajectory(waypoints, planner_type='b_spline', duration=None, num_points=800, bspline_degree=5, segment_method='quintic', duration_per_segment=None, num_points_per_segment=100, gripper_waypoints=None)
Plan a joint-space trajectory, supporting the B-Spline and multi-segment trajectory plannersParameters:
waypoints: Joint waypoint array [n_waypoints, n_dof] (radians)planner_type: Planner type, 'b_spline' or 'multi_segment', default 'b_spline'num_points: Number of trajectory points (for B-Spline), default 800bspline_degree: B-Spline degree, 3 (cubic) or 5 (quintic), default 5segment_method: Multi-segment method, 'cubic' or 'quintic', default 'quintic'duration_per_segment: Duration per segment (seconds, for Multi-Segment)num_points_per_segment: Number of points per segment (for Multi-Segment), default 100gripper_waypoints: Optional gripper value array [n_waypoints] (0-1000)
Return value: A dictionary containing 't', 'q', 'qd', 'qdd', and optionally 'gripper'
-
plan_cartesian_trajectory(waypoints, duration=None, num_points=100, backend=None)
Plan a Cartesian-space spline trajectoryParameters:
waypoints: Waypoint array [n_waypoints, 4, 4] (transformation matrices) or [n_waypoints, 3] (position only, using identity orientation)duration: Total trajectory duration (seconds, optional; if None, automatically estimated)num_points: Number of trajectory points, default 100backend: Computation backend, 'numpy' or 'torch' (default: None, uses the backend set at initialization)
Return value: A dictionary containing 't', 'poses', 'positions', 'orientations', 'velocities', 'accelerations'
-
solve_ik_for_trajectory(target_poses, q_init=None, method='dls', max_iters=100, pos_tol=1e-2, ori_tol=1e-2, num_initial_guesses=5, initial_guess_strategy='random', initial_guess_scale=0.6, random_seed=None, backend=None, use_previous_solution=True)
Batch-solve inverse kinematics for a series of Cartesian posesParameters:
target_poses: Target pose array [n_poses, 4, 4] (transformation matrices)q_init: Initial joint configuration (if None, uses the current joint angles)method: IK solving method, 'dls', 'pinv', or 'transpose', default 'dls'max_iters: Maximum number of IK iterations per pose, default 100pos_tol: Position tolerance (meters), default 1e-2ori_tol: Orientation tolerance (radians), default 1e-2num_initial_guesses: Number of multi-start attempts, default 5initial_guess_strategy: Initial-guess strategy, one of 'zero', 'random', 'sobol', 'latin', 'center', 'uniform', default 'random'initial_guess_scale: Initial-guess scaling factor (0.0 to 1.0), default 0.6random_seed: Random seed, for reproducibility, default Nonebackend: Computation backend, 'numpy' or 'torch' (default: None, uses the backend set at initialization)use_previous_solution: If True, uses the previous solution as the initial guess (ensures continuity), default True
Return value: A dictionary containing 'joint_angles', 'ik_results', 'success_rate', 'statistics'
State Retrieval:
-
get_robot_state(info_type="joint_gripper", timeout=1.0, cache=True)
Unified robot state-retrieval interface; returns different types of data based oninfo_type:Parameters:
info_type: Information type, possible values:"joint_gripper": Returns aJointStateobject (default), containing:angles: List of six joint angles (radians)gripper: Gripper opening (0-1000, 0 is fully closed, 1000 is fully open)timestamp: Timestamp (seconds)run_status_text: Operating status text ("idle", "locked", "sync", "sync_locked", "overheat", "overheat_protect", "unknown")
"joint": Returns only the joint-angle listList[float](radians)"gripper": Returns only the gripper valuefloat(0-1000)"version": Returns a version information dictionary containingserial_number,hardware_version,firmware_version"temperature": Returns the servo temperature listList[float](degrees Celsius)"velocity": Returns the servo velocity listList[float](degrees/second)"self_check": Returns a self-check status dictionary containingraw_mask,bits,timestamp"gripper_type": Returns the gripper type string (e.g., "50mm" or "100mm"); returns None on failure
timeout: Maximum wait time (seconds), default 1.0cache: Whether to use the cache (only valid for gripper_type), default True
Return value: Returns the corresponding type of data based on
info_type; returnsNoneon failure -
get_pose(backend=None)
Get the current end-effector position and orientation; returns a dictionary containingtransform,position,rotation,euler_xyz,quaternion_xyzwParameters:
backend: Computation backend, 'numpy' or 'torch' (default: None, uses the backend set at initialization)
Return value: A dictionary containing transform, position, rotation, euler_xyz, quaternion_xyzw; returns None on failure
-
print_state(continuous=False, output_format='deg', fps=200.0)
Print the current robotic-arm information; can print continuously and supports degree/radian format. Includes joint angles, gripper state, end-effector pose, temperature, velocity, and moreParameters:
continuous: If True, print continuously; if False, print only once, default Falseoutput_format: Angle format, 'deg' (degrees) or 'rad' (radians), default 'deg'fps: Target frame rate for continuous mode (Hz), default 200.0
Gripper Control:
-
set_robot_state(gripper_value=...)
Control the gripper through the unified interface; gripper_value range is 0-1000 (0 is fully closed, 1000 is fully open)Example:
# Open the gripper
robot.set_robot_state(gripper_value=1000)

# Close the gripper
robot.set_robot_state(gripper_value=0)

# Set joints and gripper simultaneously
robot.set_robot_state(target_joints=[0.1, 0.2, 0.3, 0.4, 0.5, 0.6], gripper_value=500)
System Control:
-
torque_control(command, timeout=1.0)
Enable or disable the torque ('on' or 'off')Parameters:
command: Command, 'on' or 'off'timeout: Maximum time to wait for a response (seconds), default 1.0
Return value: Returns True on success, False on failure
-
zero_calibration()
Perform the zero-calibration procedure: turn off torque → manual drag → restart torque → record zero point
4.3 RoboCore Integration
The SDK integrates the RoboCore library, providing high-performance kinematics and trajectory-planning functionality:
Kinematics Functions (from robocore.kinematics):
forward_kinematics(robot_model, q, backend='numpy', return_end=True)inverse_kinematics(robot_model, pose, q_init, backend='numpy', method='dls', ...)jacobian(robot_model, q, backend='numpy', method='analytic')